This guide explains how to connect your QuickBooks account to InstaDispatch and how to manage invoices and customer records seamlessly.
How to Get QuickBooks API Keys for Integration
1. Create an Intuit Developer Account
Go to:
👉 https://developer.intuit.com
Sign up or log in with your Intuit (QuickBooks) account.
2. Create a New App
1. After login, go to Dashboard → Create an app
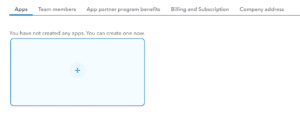
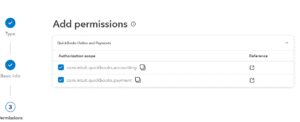
2. Choose QuickBooks Online and Payments
3. Give your app a name and create it.
3. Get Your API Keys
Inside the app:
Under Keys & OAuth → Development
You will find:
- Client ID
- Client
- Redirect URI input
- Environment ( Production)
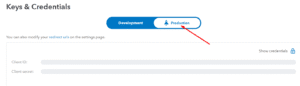
👉 These are the keys used to integrate with InstaDispatch, email these keys to us at help@instadispatch.com.
Connecting QuickBooks to InstaDispatch
Once you share your QuickBooks API keys, our team will integrate your QuickBooks account with InstaDispatch.
After integration, you will be able to:
- Send invoices from InstaDispatch directly to QuickBooks
- Manage payments synced from QuickBooks
- Create and sync customers from InstaDispatch to QuickBooks
Sending Invoices to QuickBooks
To send invoices to QuickBooks:
1. Log in to InstaDispatch
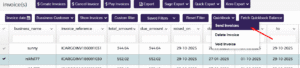
2. Go to Invoicing
3. Select the invoices you want to send to QuickBooks and click at “Send Invoices”
4. Choose one of the four document options:
- PDF only
- CSV only
- PDF + CSV
- No documents
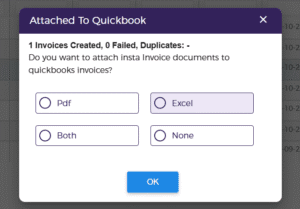
5. Click on “OK” the selected invoices will be sent
Important Rules
- You can send maximum 10 invoices at a time
- Once an invoice is successfully created in QuickBooks, the In_QB column in InstaDispatch will update to “Yes”
- Already exist number in QuickBooks, can’t add again from InstaDispatch side
Voiding or Deleting QuickBooks Invoices
You can void or delete QuickBooks invoices directly via InstaDispatch.
Steps:
- Go to Invoicing
- Select the invoice
- Choose Void or Delete
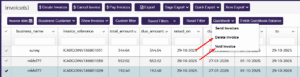
The invoice will be voided or deleted instantly in your QuickBooks account.
Managing Invoice Payments
Automatic Payment Sync
If an invoice is marked Paid in QuickBooks, it will automatically show as Paid in InstaDispatch.
Manual Sync
If you want to manually update payment status:
- Go to Invoicing
- Click “Fetch QuickBooks Balance”
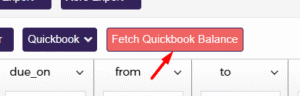
This will pull the latest payment information from QuickBooks.
Managing Customers From InstaDispatch to QuickBooks
You can create QuickBooks customers directly from InstaDispatch.
To Create a QuickBooks Customer from InstaDispatch
- Go to Customers
- Select the customer
- Click “QuickBooks Customer”
- The customer will be created in QuickBooks instantly

This keeps both platforms in sync without manual duplication.