This guide explains how new InstaDispatch users can assign pickup and delivery drops/jobs to Agents or Drivers from the Route Planner. It covers both normal orders and multi-drop / multi-stop orders.
What are Drops / Jobs in InstaDispatch?
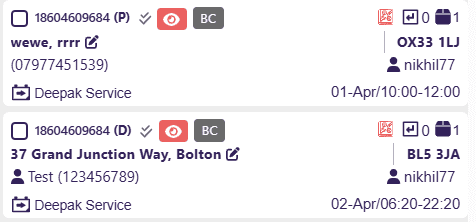
In InstaDispatch, when an order is booked, the system creates drops for that order.
For a standard pickup and delivery order, two drops are usually created:
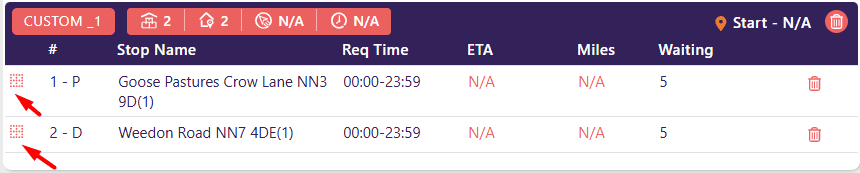
Denoted as (P) this is a drop from where the driver collects the shipment.
Denoted as (D) this is a drop where the driver delivers the shipment.
If you only want a delivery drop to be created, you can use the Drop-Off feature.[Note: If drop-off feature is enabled means the parcel does not need to be picked up and only delivery drop is created in the system]. Follow the Booking Validations Guide to know how to enable the Drop-off feature.
For a multi-stop / multi-drop order, one order can contain multiple pickup and delivery points. This means the same order may have more than two drops, depending on how many collection and delivery locations are added. The uploaded reference notes confirm that a normal order creates pickup and delivery drops, while a multi-stop order can contain multiple pickup and delivery drops under one order.

Where do unassigned drops appear?
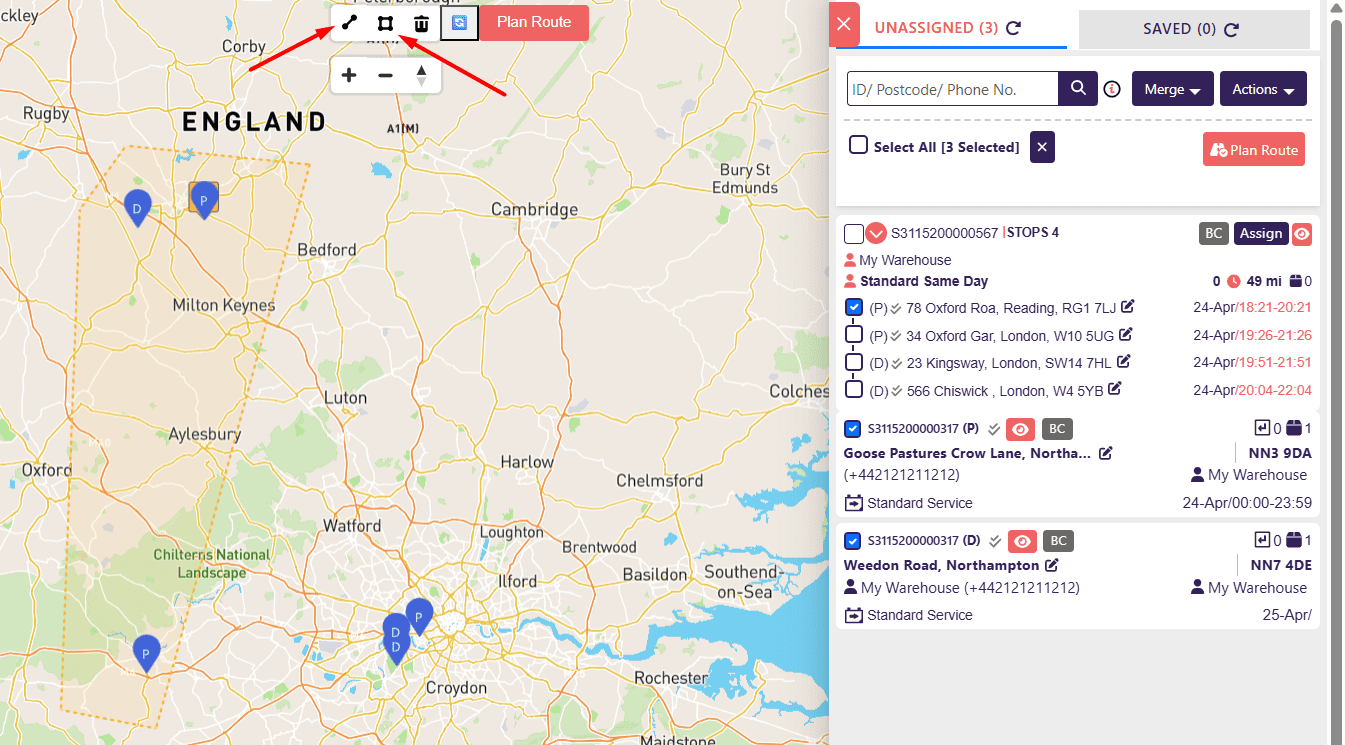
When an order is booked, the drops appear in the Route Planner under the Unassigned tab.
You can view unassigned drops in two ways:
- List / Grid View
The drops are shown in the right-side panel under the Unassigned tab. - Map View
The drops are also visible as markers on the map.
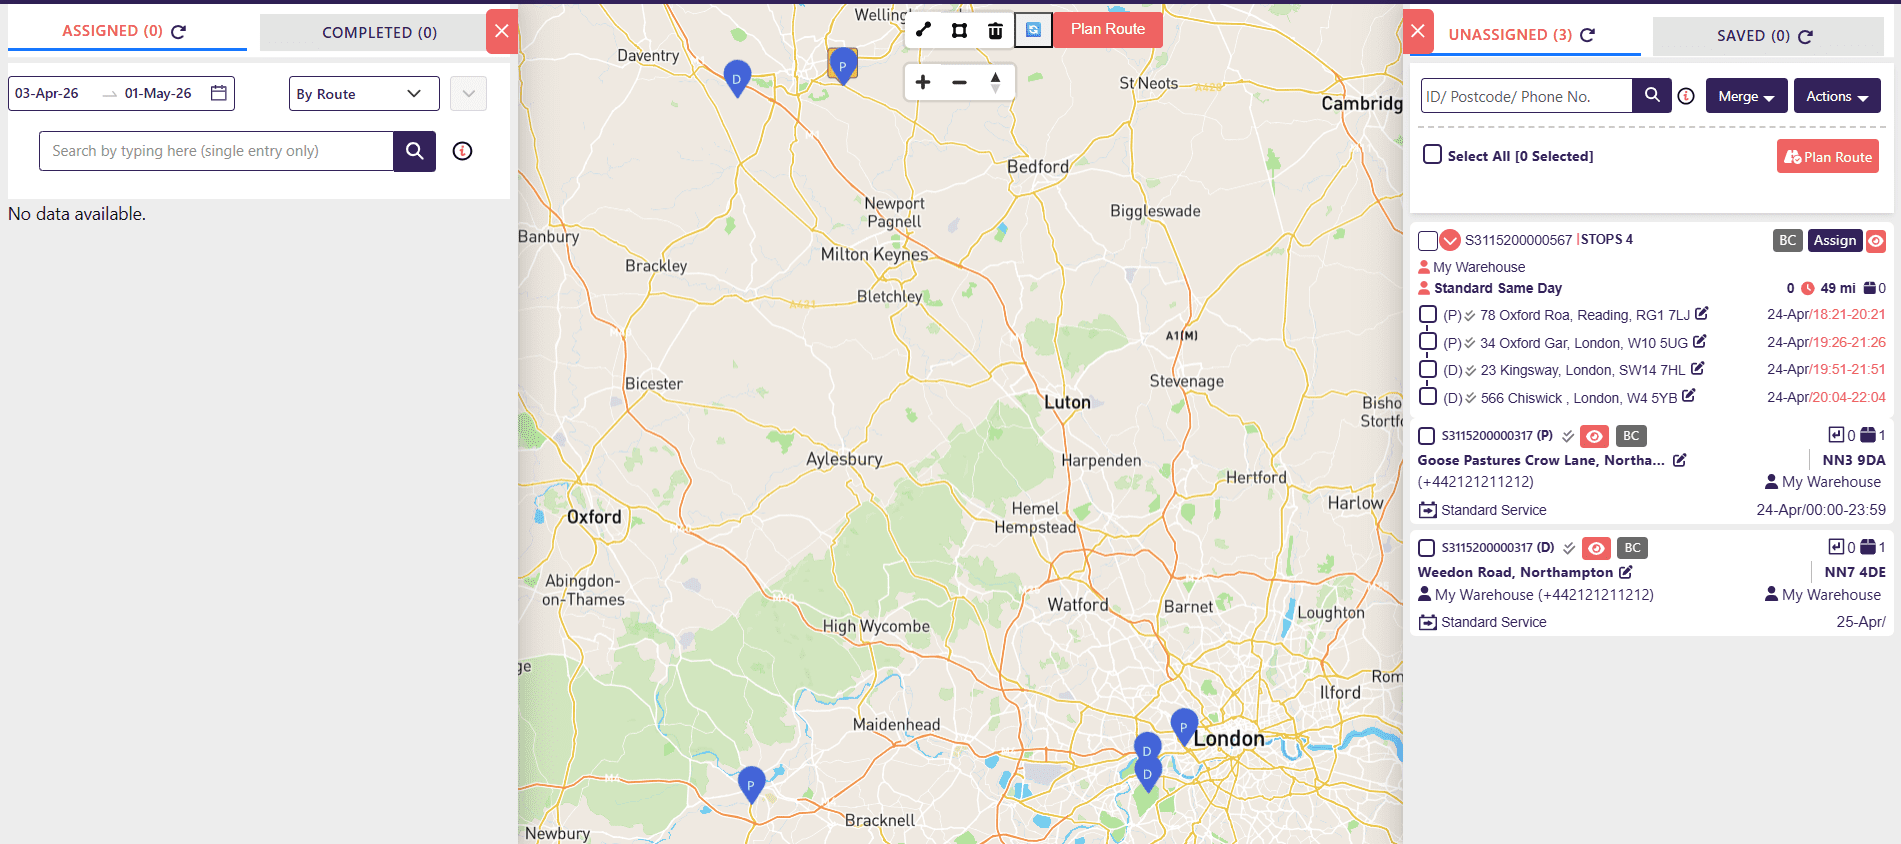
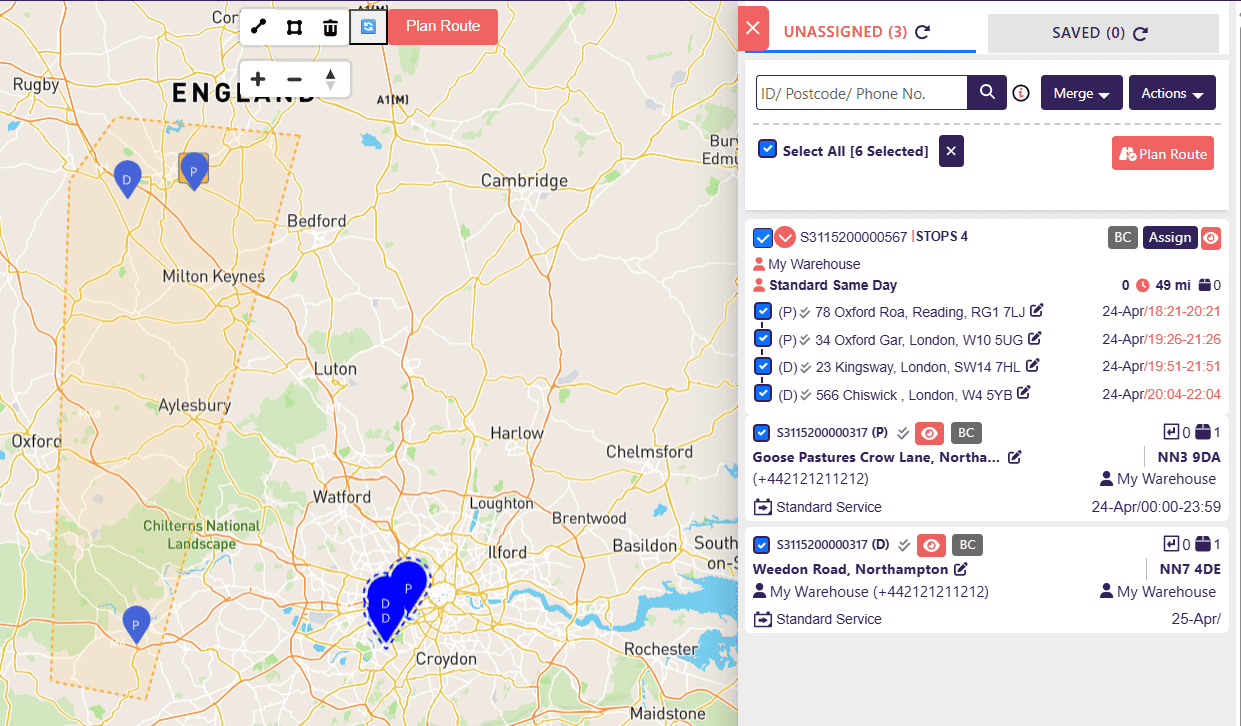
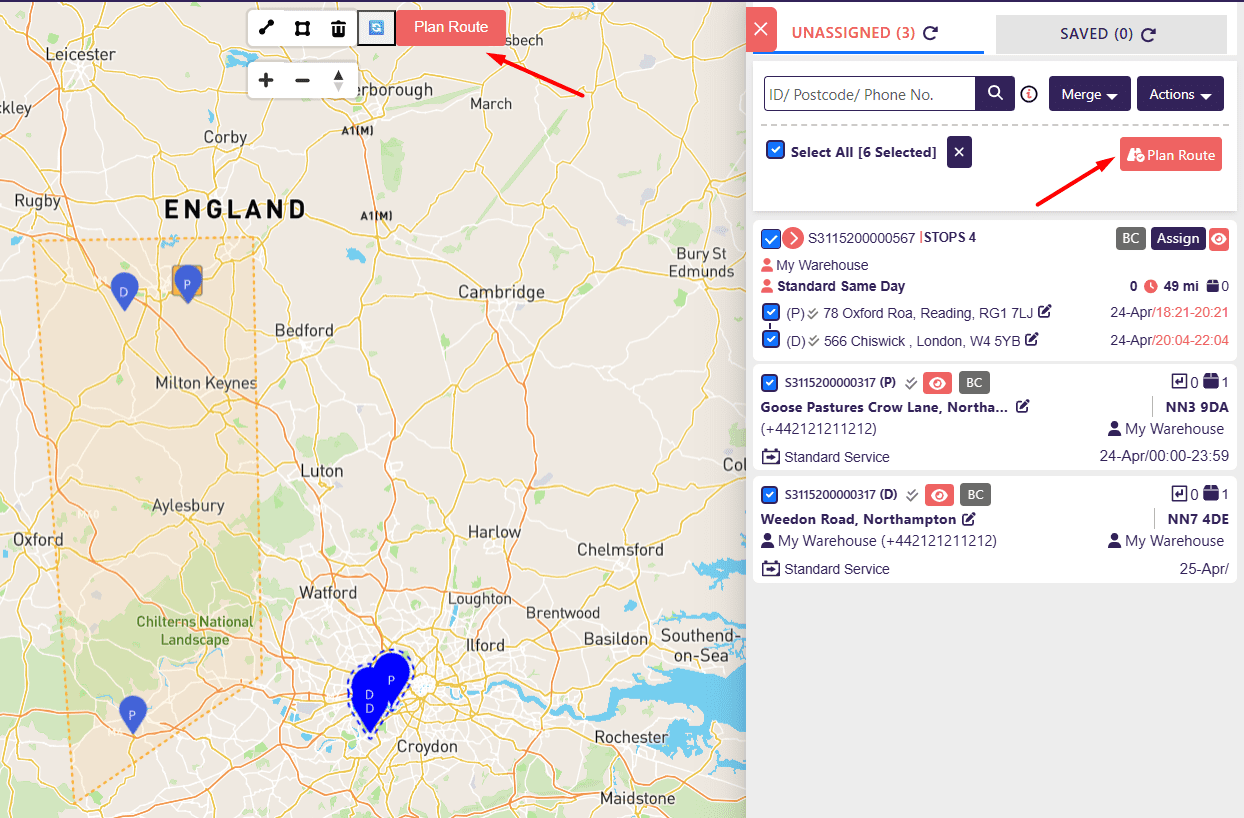
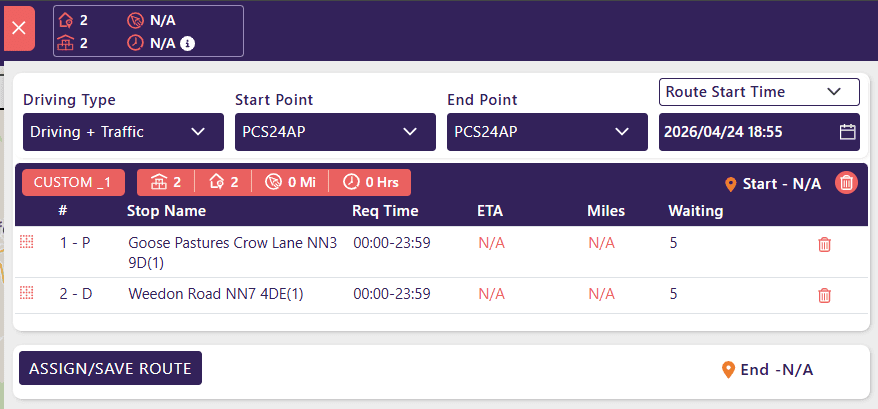
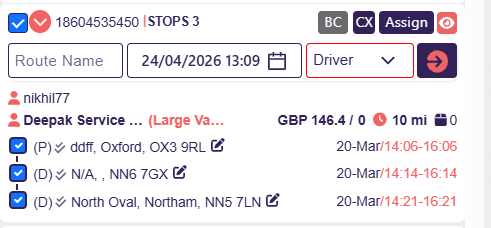
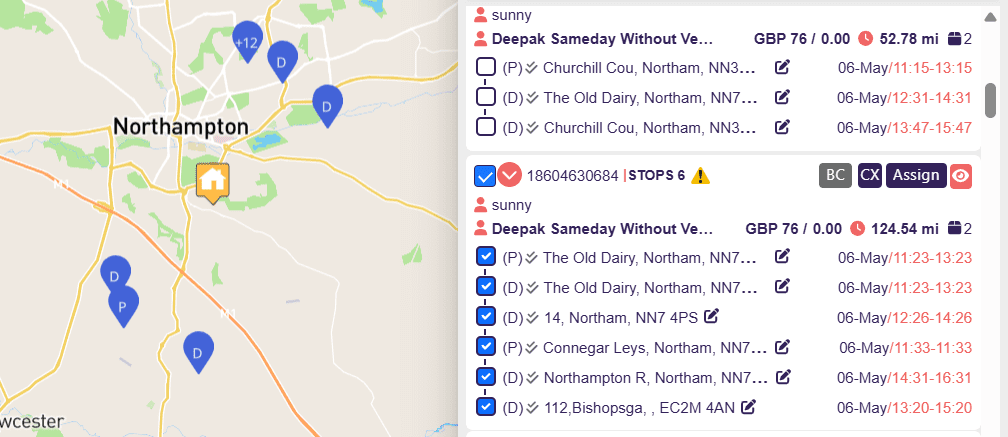
This process is used when you want to assign normal pickup and delivery drops to an Agent. You can select drops in either of these ways: In the right-side Unassigned panel, tick the checkbox beside the drop you want to assign. You can select one drop or multiple drops. Once selected, the chosen drops will be highlighted so you can confirm you have selected the correct jobs. You can also select drops directly from the map using the map selection tools. For example, you can use the polygon or drawing tool to draw around a group of drops. This is useful when you want to assign drops from the same area to one Agent. You can also select drops from the list as well as from the map After selecting the required drops, click the Plan Route button (from Map or List). A pop-up will open showing the selected drops. This screen allows you to review the route before assigning it to an Agent. In the Plan Route pop-up, check the selected pickup and delivery drops. You should review: This is the stage where the dispatcher confirms that the right jobs have been selected before route assignment. If required, you can manually change the order of drops. Simply hold the drop using the red square box and drag and drop the selected drops up or down to adjust the route sequence. The sequence you set here is important because the same order of execution will be shown to the Agent on the Driver App after assignment. From the route planning screen, you may optimize the route or calculate ETA if the feature is available in your account. The Route Optimization & ETA feature is a paid add-on. However, it can be tested during the trial period based on the account setup. The users can still assign the route without calculating ETA if ETA is not required. Use this feature when you want the system to help calculate a better route order and estimated arrival times. [ You can refer the detailed guide on how Route Optimization & ETA feature works here] You can still assign drops to the Agent without ETA calculation. After reviewing the drops and sequence, click Assign / Save Route. A section will appear asking for route details. You will usually need to enter: After selecting the Agent, click Assign. This assigns the route to the selected Agent. Once assigned: After assignment, the route will appear in the Route Planner under the assigned route view. The dispatcher can monitor the route and check real-time updates such as: The uploaded reference confirms that after assignment, the selected drop order is maintained and the same execution order appears to the Driver on the app. Multi-drop orders work slightly differently because one order can include multiple pickup and delivery drops. There are two common ways to assign multi-drop orders: Use this method when you want to assign the entire multi-drop order as one route to a single Agent. Go to the Route Planner and locate the multi-drop order under the Unassigned section. A multi-drop order will show multiple stops under the same order. For example, it may show: In the multi-drop order section, click Assign. This opens the assignment fields for that order. You will need to provide: After entering the route name, start time, and Agent, click the arrow button. The full multi-drop order will be assigned to the selected Agent as one route. In this method, only that single multi-drop order becomes part of the route. No other orders are added unless you manually select them separately. The uploaded reference confirms this process for assigning one single multi-drop order using the Assign button under the multi-drop section. Use this method when you want to combine drops from different orders into one Agent route. This is useful when: From the Unassigned tab or map view, select the drops you want to assign. You can select: Use the checkbox in the Unassigned list or select drops from the map. After selecting all required drops, click Plan Route. The system opens the selected drops in the route planning pop-up. Check that all selected drops are correct. Then arrange the sequence manually if needed. You can drag and drop items to change the order. If you have the Route Optimization & ETA add-on, you can use it to optimize the sequence and calculate ETA. If you do not need ETA, you can still assign the route without ETA/ Once the route is ready, click Assign / Save Route. Enter: Then click Assign. The selected drops will be assigned to the chosen Agent as one route. During route planning, you may see both Assign and Save Route options. Use Assign when the route is ready and you want to send it to the Agent immediately After assignment, the Agent will receive the route/job on the Driver App. Use Save Route when you want to prepare the route but not assign it to an Agent yet. This is useful when: Once the route is assigned: The selected drop sequence in the Admin Portal is reflected to the Agent in the Driver App. To assign drops/jobs to an Agent in InstaDispatch:
Before assigning drops to an Agent, make sure:
Part A: Assigning Non-Multi-Drop Orders to Agents
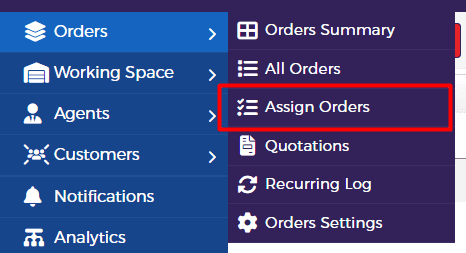
Go to Orders from the Side Panel on the dashboard, select Assign Orders, this will open the Route Planner dashboard.
Option 1: Select drops from the Unassigned Tab
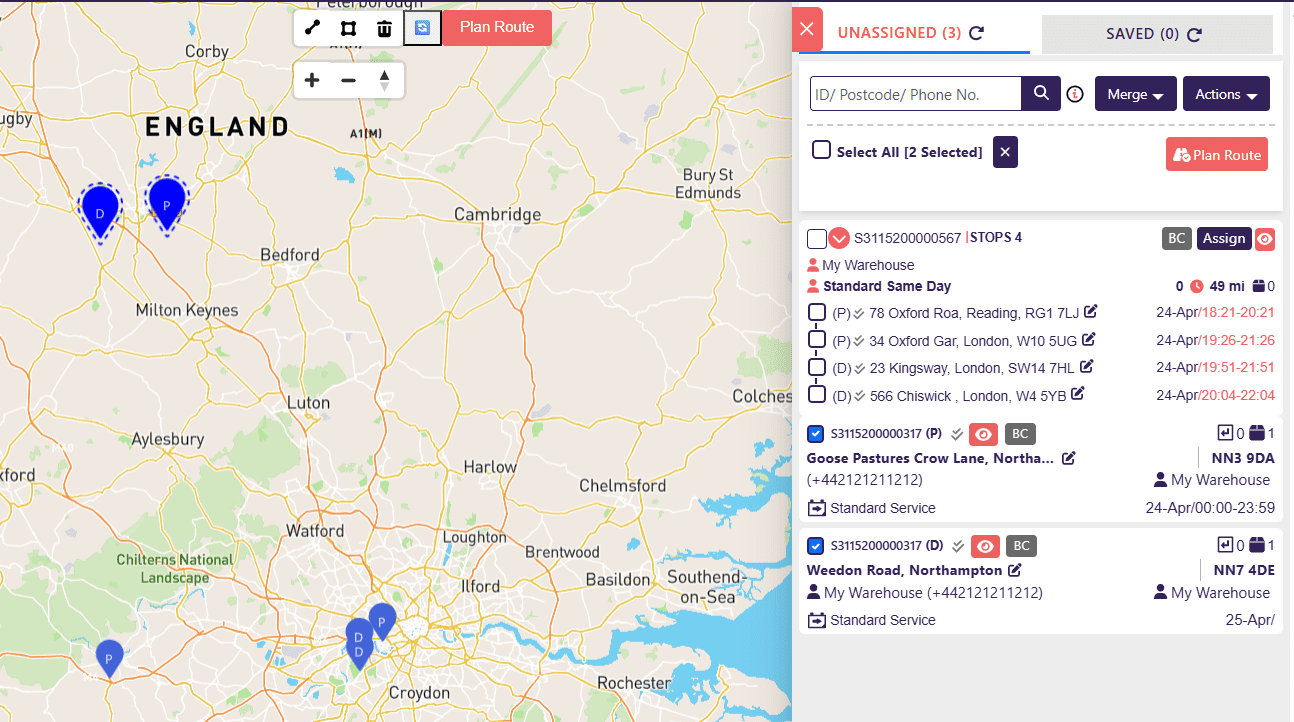
Option 2: Select drops from the map
Option 3: Select drops from the map and list both
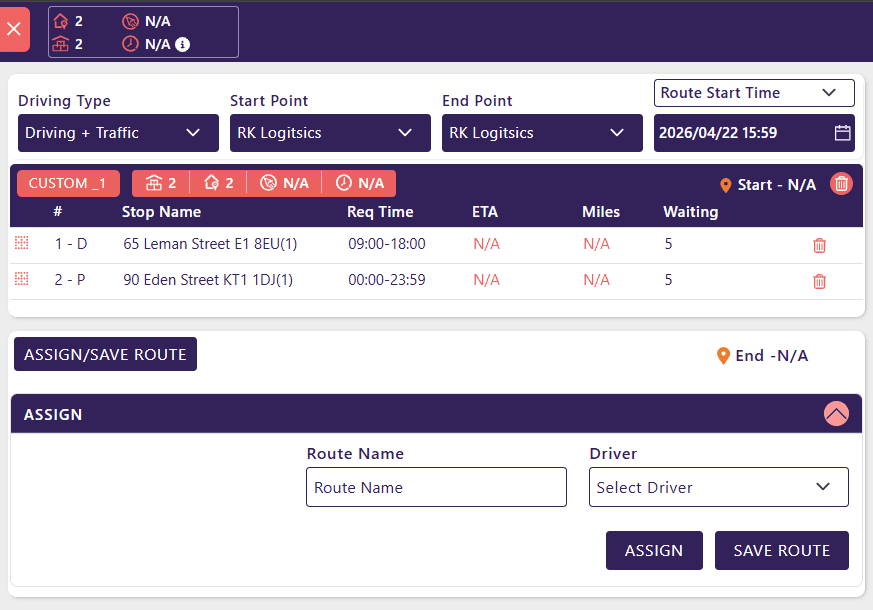
Add a clear route name so the route can be easily identified later.
Example:
Select the Agent or Driver from the dropdown list.
The dropdown will show the Drivers/Agents already created in the system.
Part B: Assigning Multi-Drop / Multi-Stop Orders
Method 1: Assign one complete multi-drop order to an Agent
Enter a name for the route.
Select the start date and time for the route.
Select the Agent who should complete this multi-drop order.![]()
Method 2: Assign multiple drops or multiple multi-drop orders together
Assign vs Save Route
Assign
Save Route
What happens after assigning drops to an Agent?
Best practices for assigning drops
Common mistakes to avoid
Quick summary