This notification helps to ensure that customers are available to receive their deliveries, and it provides them with options for rescheduling the delivery date if needed.
Option 1:
In this basic option, the delivery system sends a notification to the customer with the scheduled delivery address and date. The customer is then asked to confirm their availability with a simple “YES” or “NO” response.
Option 2 (Enhanced Version for Option 1):
In addition to the basic confirmation in Option 1, this enhanced option provides the customer with the flexibility to reschedule the delivery date if they are not available on the initially scheduled date. There are two sub-options within Option 2:
- Based on Company’s Operational Working Days:
The system considers the company’s operational working days when presenting alternative delivery dates to the customer. This means the customer will see and can select from dates that fall within the company’s regular working days.
- Based on Consignee Address Postcode:
This sub-option takes into account the specific operational days set by the courier company for different areas based on the consignee’s address postcode. Each area might have different days when deliveries are made.
The system will display and allow the customer to select only those dates on which the courier company delivers parcels in their specific area, as determined by the consignee’s address postcode.
OPTION I — Customer Availability
In order to activate this notification please follow below steps:-Booking Communication NEW (1)
1, Go to Notification Settings > Open NEXT DAY tab > Edit Delivery Rescheduling
2. Pick operation on which you want to trigger notification at booking confirm, at collection, at scanned in warehouse(open unload scan, unload finished route on collected), at routes planning (Save Route).
3. Put your template in the SMS & Email tab and Save it. To get example templates CLICK HERE
4. If you pick at Booking Confirm operation to get availability confirmation a notification will trigger to your end customer along with the booking confirmation.
It will have a link on which if your customer will click on the link provided in the notification they get a screen where they have to select YES or NO as per their availability.
Note: for other operations at collected & scanned In warehouse it will work same as booking confirmation.
If you select “Route Planning ” in notification settings, you can see a button of Send Re-Scheduling Email at the SAVED ROUTE, that will trigger the same notification for all planned deliveries of the route.
OPTION II — Customer Availability With Rescheduling Option
Based on Company’s Operational Working Days:
To give an option to the consignee to reschedule their deliveries based on Company’s Operational Working Days, please follow the same steps from 1 to 5 and in addition you have to enable Delivery Rescheduling Confirmation.
6. By default is set for 1 week Mon – Sat, if you want to change delivery rescheduling period then click on edit select days range and your opening days fill
7. Fill your subject line, name, reply to details and click on Submit
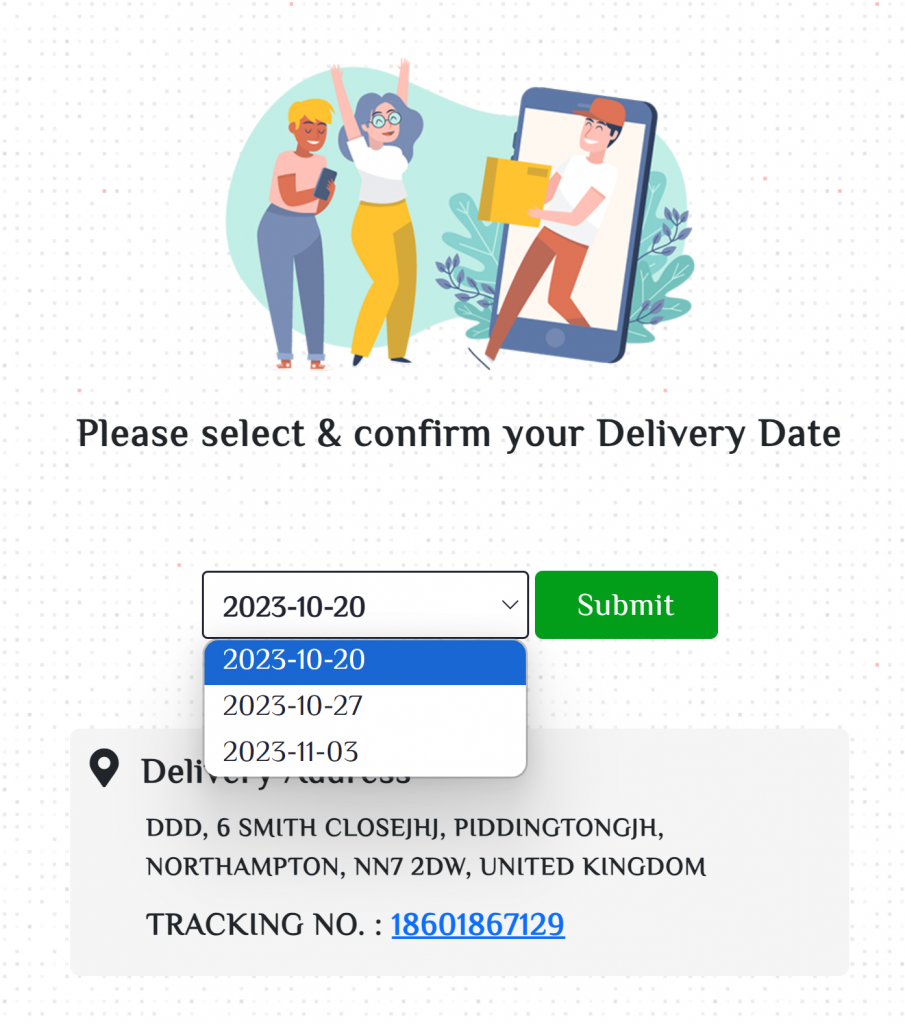
8. Now the consignee will receive the same email but with a rescheduling option, now they can select the date of their choice on which they are available and submit.
Based on Consignee Address Postcode:
Here’s a step-by-step explanation of how to enable this option:
Go to the Settings Page: Login in your account and navigate to the following URL: https://route.instadispatch.com/#/SettingsNew
This is where you will access the settings for InstaDispatch.
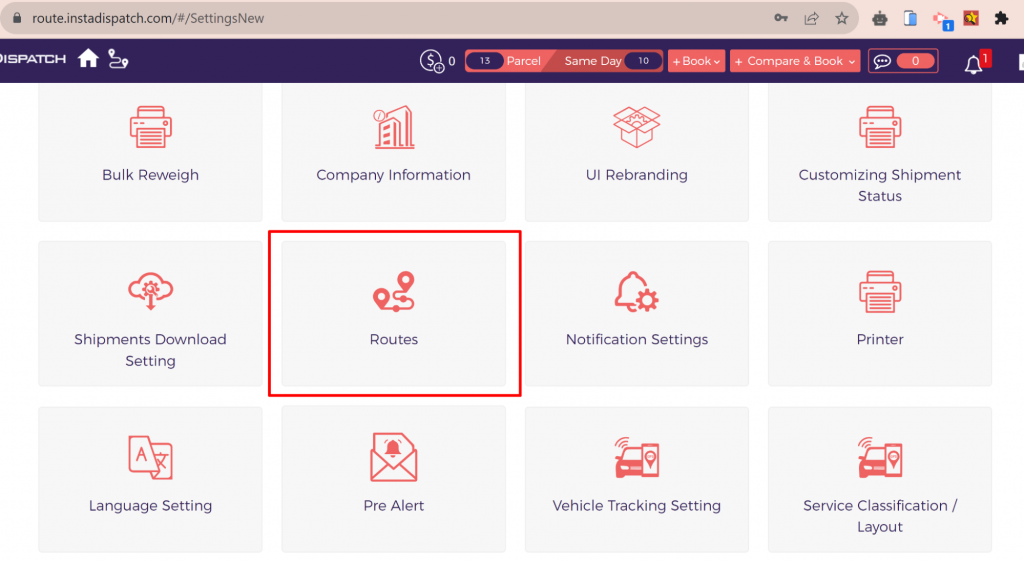
Select the “Route” Option: After accessing the Settings Page, look for the “Route” option, Click on it to proceed.
Set “Predefined Pickup and Delivery” to “Yes”: Under the “Route Setting” tab, you should find an option called “Predefined Pickup and Delivery.” Change the setting to “Yes.” Incase, you do not want to show the Predefined delivery and collection date to customer on their booking portal select “No” for Booking screen:
Define Routes: Now, go to the “Routes” tab, which is typically where you set up specific delivery routes.
- Enter the name of the route you want to create. Give it a meaningful name that represents the specific delivery route.
- For this route, specify the postcodes (ZIP codes) that are covered by this particular route. These postcodes indicate where the deliveries will take place.
- Select the days under “Collection/Delivery on” when the delivery happens for the postcodes entered in this route. This means specifying the days when deliveries are scheduled for each postcode.
Note: The other options like “Sale Cut off,” “Enable Auto Routing,” “Hub,” “Notification/SMS,” etc., may not be relevant to this specific feature and can be ignored.
- Finally, click on the “Add Route” button to save this route configuration.
Repeat for Other Routes: You can create as many routes as needed by following the same procedure for each one. This allows you to define different delivery routes based on postcodes and their respective delivery schedules.
Once these routes are configured, the system will use the postcode information to determine delivery dates. When a consignee receives an email with a delivery confirmation link, they will only see and be able to select delivery dates that correspond to their specific postcode. This ensures that consignees can only choose delivery dates that are relevant to their location, improving the efficiency and accuracy of the delivery process.
How Can Dispatchers Track Confirmed Delivery Dates?
- In order to know how many consignee’s have provided their delivery confirmation.
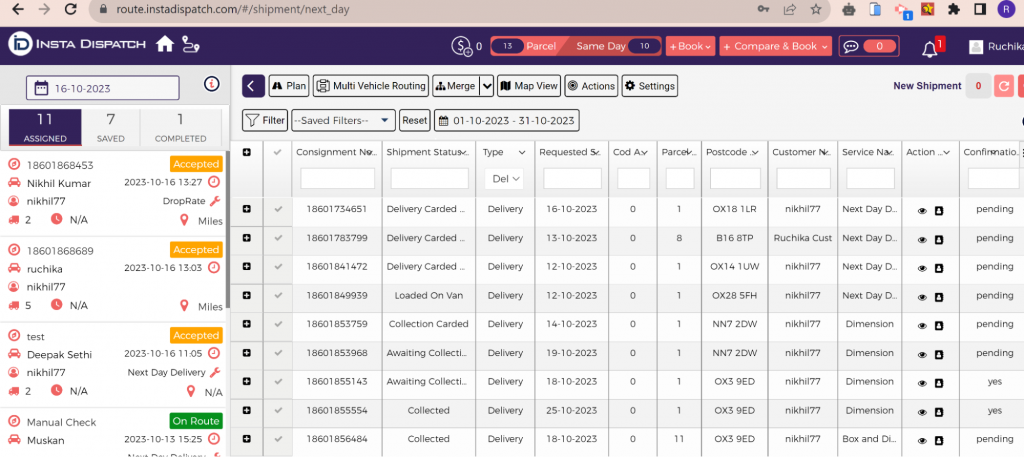
Grid View: Dispatchers have to visit the Next Day Routing Page (https://route.instadispatch.com/#/shipment/next_day) . On this page there is a column with the confirmation in which you can track confirmations as YES/ PENDING.
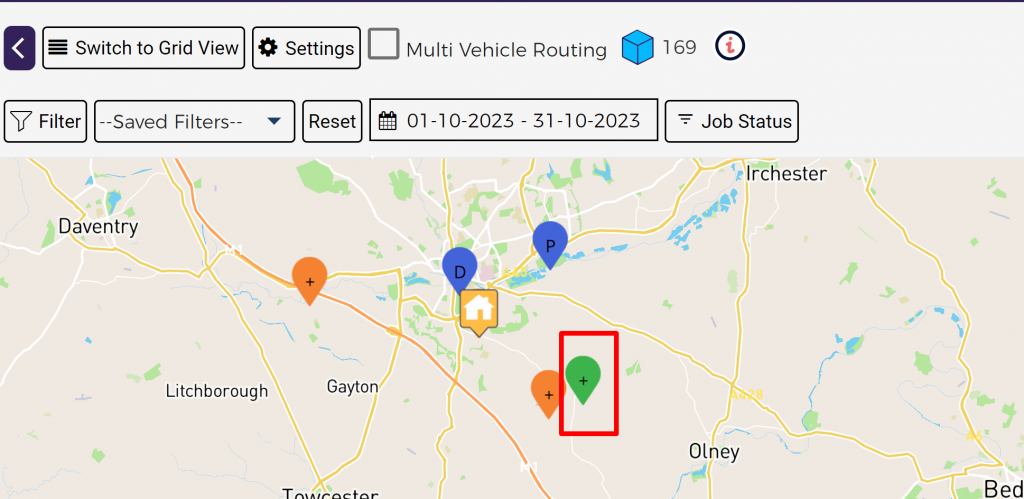
Map View: Grid View: Dispatchers have to visit the Map View route planner (https://route.instadispatch.com/#/route_planner). Confirmed Delivery will show with green color drop.
2. In custom filters ( On both Grid and Map View) there is an option of Delivery Confirmation from which you can filter your results with Yes OR Pending status.
3. If you manually want to enter your delivery confirmation or re-scheduling details go to the all shipment page > click on edit shipment > click on SCANS & EMAILS tab > in Delivery Confirmation fill your data > Save Schedule
Dispatcher to Manually send Delivery Date Confirmation email
System allows dispatchers to manually send a Delivery Date Confirmation email to end recipients. This feature is particularly useful in situations where a customer may have missed the initial email containing a link to confirm the delivery date.
This can be done from Edit shipment page and from the Routing screen:
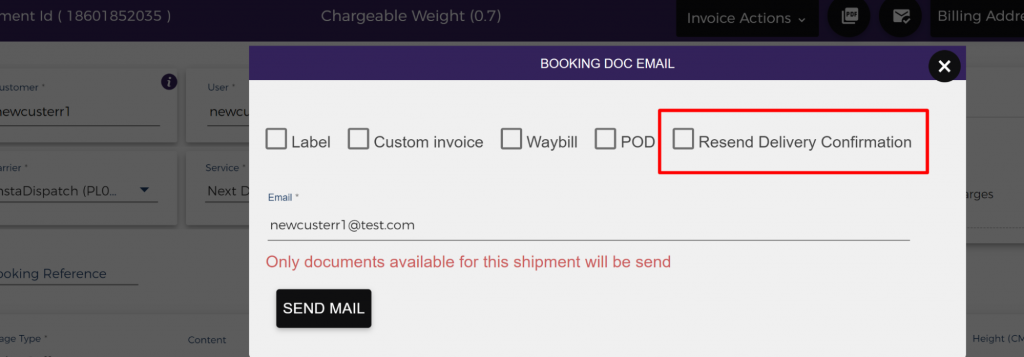
From Edit Shipment Page – Select the Shipment > click on edit shipment > click on the email icon available on the top right hand side of the pop-up > Select the option “Resend Delivery Confirmation” and enter the email address on which you want to send the delivery rescheduling email.
From Routing Screen –
Visit the next day routing screen (https://route.instadispatch.com/#/shipment/next_day) > Select the delivery job and click on Actions button > Click on Send Delivery Confirmation
Dispatcher to Confirm Delivery Date on behalf of End Recipient
System allows Dispatchers to manually confirm the delivery date from their portal. This feature is particularly valuable when the end recipient confirms the delivery date via phone or verbally, as the end recipient was not able to give the confirmation through email or the normal system generated process of confirming the Delivery date . This is how it works:
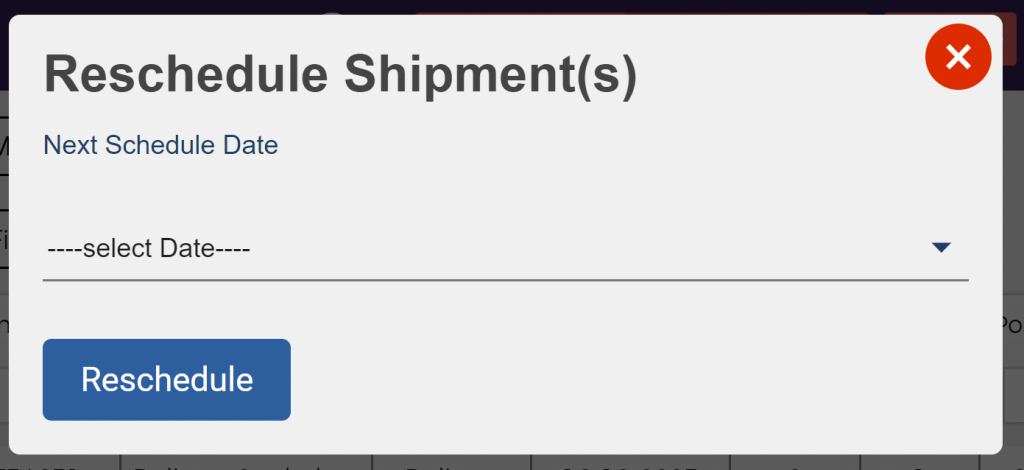
Visit the next day routing screen (https://route.instadispatch.com/#/shipment/next_day) > Select the job and click on Actions button > Click on Schedule Shipment
Select the Date and Click on Reschedule


