- Open Load Scan through the Driver App
- Merging the Shipments in an Existing Route
- Open Unload Scan through the Driver App
- Additional Information: Unload Scan Data Log
OPEN LOAD SCAN THROUGH THE DRIVER APP
The “Open Load Scan” feature enables the drivers to scan parcels themselves and generate a route, which will be automatically assigned to the driver who initiated the route creation. Here’s a step-by-step guide on how to create routes using Open Load Scan :
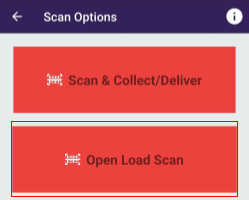
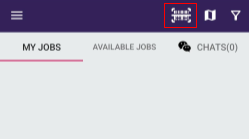
Step 1 : Navigate to the top right corner and tap on the barcode icon.

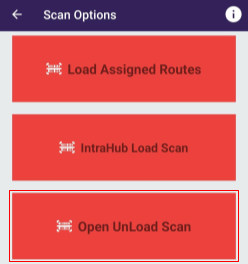
Step 2 : Select the “Open Load Scan” option.
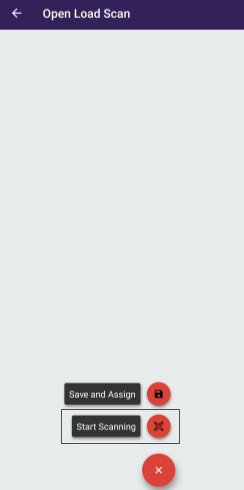
Step 3 : Tap on the “Start Scanning” option.
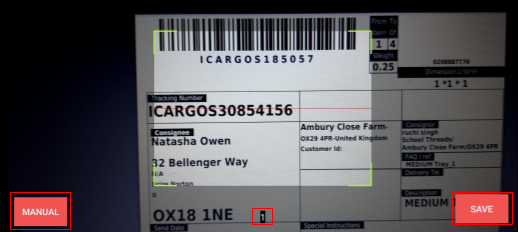
Step 4 : Begin scanning the parcels. Alternatively, you have the option to manually scan the parcel. Simply select the ‘Manual’ option and input the necessary data. As you scan the parcels, the number displayed in the center of the screen increases.
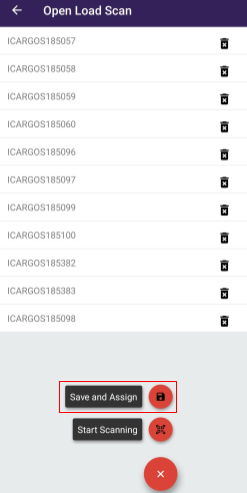
Step 5 : Upon clicking the “Save” button, a screen will appear, listing all the scanned parcels. Additionally, you’ll have the option to remove any parcel that you believe was scanned incorrectly or by mistake.
Step 6 : To create a route, click on “Save and Assign.”
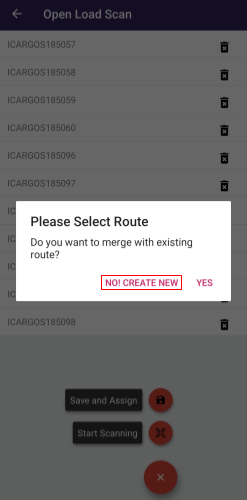
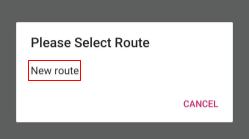
Step 7 : A message will pop up, giving you the choice to create a new route or merge with an existing one. Select “No! Create New.”
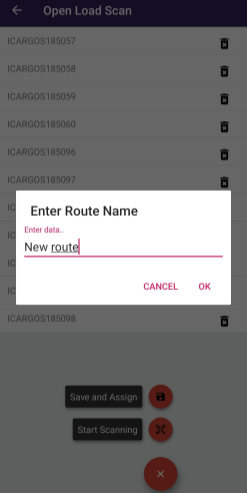
Step 8 : Input a new route name, and then tap on “OK.”
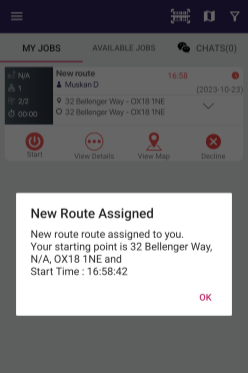
Once you tap “OK,” the screen will automatically return to the Dashboard, and the new route will be assigned to the driver who scanned the parcel.
MERGING THE SHIPMENTS IN AN EXISTING ROUTE
The driver should follow the following steps if they prefer to merge the scanned shipment with an existing route rather than creating a new one :
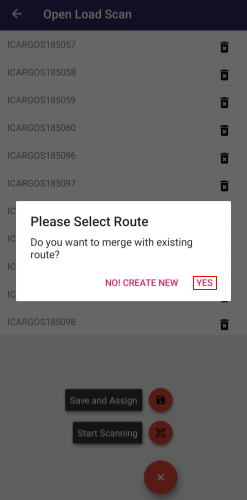
Step 1 : Select “Yes” after clicking on “Save and Assign.”
Step 2: A pop-up message will display, giving you the option to select a route from the existing ones.
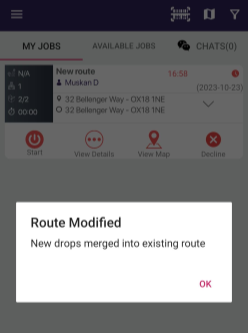
Step 3: Select an existing route by tapping on it, and the recently scanned shipments will be merged into the chosen existing route.
OPEN UNLOAD SCAN THROUGH THE DRIVER APP
Utilize the “Open Unload Scan” option to unload parcels at the warehouse. This feature should be employed only after a route has been completed, and there are undelivered or returned items still on the van.
Step 1 : Access the Barcode Icon
Navigate to the top right corner and tap on the barcode icon.
Step 2 : Choose “Open UnLoad Scan”
Select the “Open UnLoad Scan” option from the available scanning choices.
Step 3 : Start a New Scan
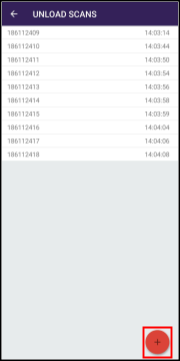
Tap on the ‘+’ symbol to initiate a new scan session.

Step 4 : Scan Parcels
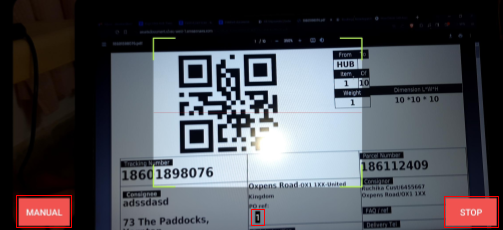
- Begin scanning parcels
- Alternatively, choose the ‘Manual’ option to input parcel information manually.
- As you scan parcels, the count displayed in the center of the screen will increase.
Step 5: Stop Scanning
- After completing the scanning process, tap on ‘Stop.’
- A list of the scanned parcels will be displayed.
- You can include additional parcels by tapping on the ‘+’ symbol at the bottom.
Step 6: Review Scans and Information
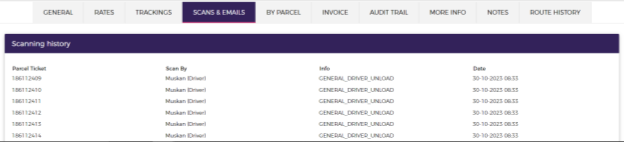
- Simultaneously, the scans and relevant information will be updated on the user interface (UI).
- The controller can access and review this information by navigating to the ‘Scans & Emails’ section on the ‘All Shipments’ page.
Additional Information: Unload Scan Data Log
We also maintain logs of all the Unloaded Scanned parcels. Simply clock on Logs from the left side menu
Then Click on Unload Scan Data
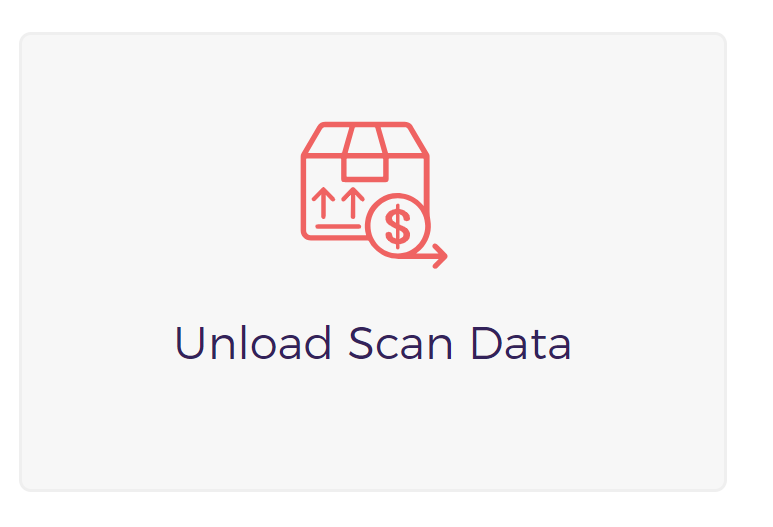
You will be able to see the list of all Unloaded parcels.There is an option to download this list in CSV format as well.


