- How to Enable Scan and Collect/Deliver through the Dispatcher Portal
- Scan and Collect through the Driver App
- Scan and Deliver through the Driver App
- Viewing Scanned Parcels on the UI
- Setting Barcode Validation
HOW TO ENABLE SCAN AND COLLECT/DELIVER THROUGH DISPATCHER PORTAL
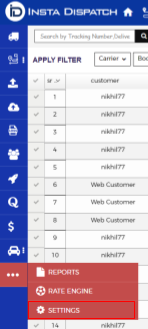
Step 1 : On the left side, locate and tap the three dots at the bottom of the screen.
Step 2 : Within the menu that opens, select “Settings.”
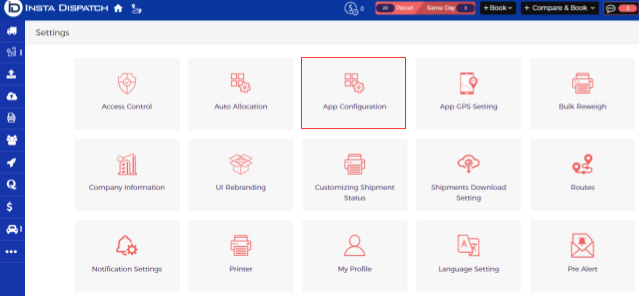
Step 3 : Within the “Settings,” look for the “App Configuration” option.
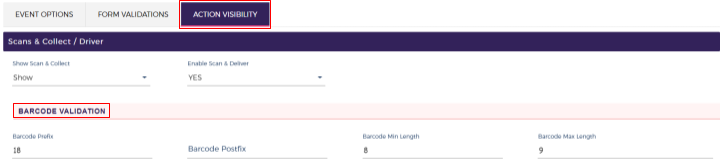
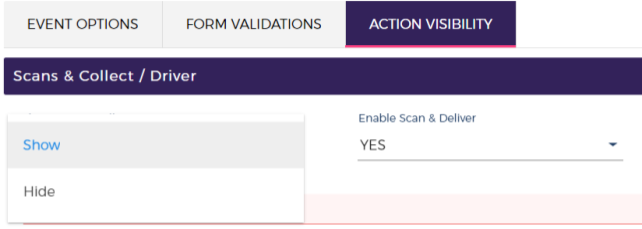
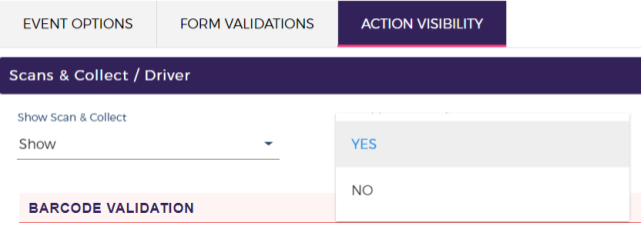
Step 4 : Under “Action Visibility” navigate to “Scan & Collect/Deliver.”
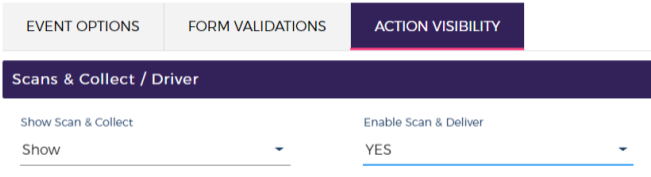
Step 5: Within the “Scan & Collect/Deliver” section, you will find the choices to “Show Scan & Collect” and “Enable Scan & Deliver.” Set the option for “Show Scan & Collect” to “Show,” and for “Enable Scan & Deliver,” set the option to “Yes.” And finally Click on the button “ SAVE CONFIGURATION” to save the selected options.
Once the controller enables this feature, the driver will gain access to the option that permits them to use “Scan & Collect/Deliver” within the app.
SCAN & COLLECT THROUGH THE DRIVER APP
Within the Driver App, this feature empowers drivers to seamlessly scan parcels not initially assigned by the controller while creating a route but are still to be collected. The status of the shipment linked to these parcels will change to “Partly Collected” or “Collected” depending on the total number of packages that are successfully scanned.
Note : This feature is accessible to drivers and is not available for use for scan terminals.
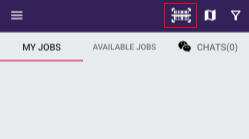
Step 1 : Navigate to the top right corner and tap on the barcode icon.
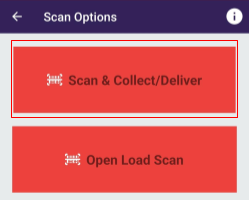
Step 2 : Select the “Scan & Collect/Deliver” option.
Step 3 : Within the “Select an Option” menu, choose “Collect.”

Step 4 : Tap on the “Scan” option, and begin scanning the parcels. Alternatively, you have the option to manually scan the parcel. Simply select the ‘Manual’ option and input the necessary data.
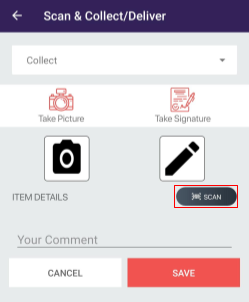
Step 5 : Remember to take a picture, obtain a signature, input any necessary comments, and then as the final step press “SAVE”.
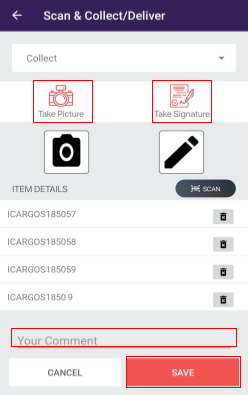
Note :- Scanning all the parcels within a single shipment is not mandatory. If you scan only a portion of them, the status will be marked as “Partly Collected.” Once you’ve scanned all the parcels, the status will change to “Collected.”
SCAN & DELIVER THROUGH THE DRIVER APP
Within the Driver App, this feature empowers drivers to seamlessly scan parcels not initially assigned by the controller while creating a route but are still to be delivered. The status of the shipment linked to these parcels will change to “Partly Delivered” or “Delivered” depending on the total number of packages that are successfully scanned.
Note : This feature is accessible to drivers and is not available for use for scan terminals.
Step 1 : Navigate to the top right corner and tap on the barcode icon.
Step 2 : Select the “Scan & Collect/Deliver” option.
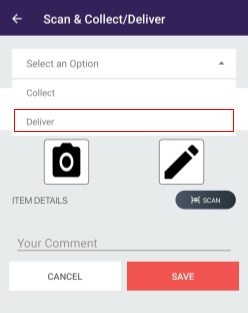
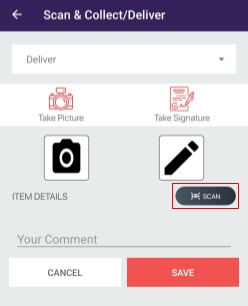
Step 3 : Within the “Select an Option” menu, choose “Deliver.”
Step 4 : Tap on the “Scan” option, and begin scanning the parcels. Alternatively, you have the option to manually scan the parcel. Simply select the ‘Manual’ option and input the necessary data.
Step 5 : Remember to take a picture, obtain a signature, input any necessary comments, and then as the final step press “SAVE”.

Note :- Scanning all the parcels within a single shipment is not mandatory. If you scan only a portion of them, the status will be marked as “Partly Delivered.” Once you’ve scanned all the parcels, the status will change to “Delivered.”
VIEWING SCANNED PARCELS ON THE UI
The controller can access shipment details through the ‘Shipments Dashboard’.
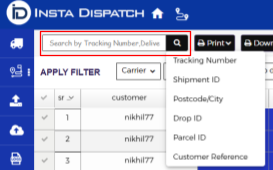
Step 1: Head to the ‘Shipments Dashboard’ page, and proceed to find your shipment by inputting the required information.
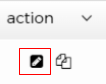
Step 2 : You can click on the ‘Edit’ option found on the ‘Shipment Dashboard.’
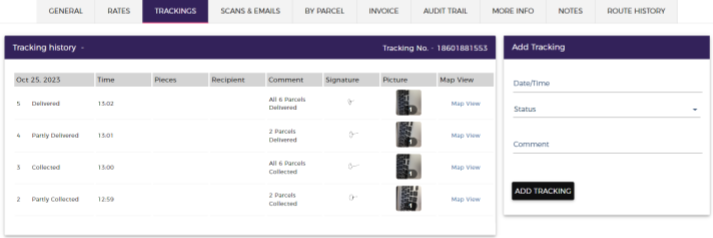
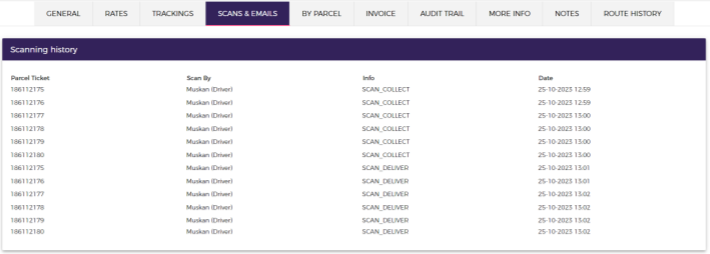
Step 3: After clicking, a window will open. Navigate to the ‘Trackings’ and ‘Scans and Emails’ sections to access information related to the process.
SETTING BARCODE VALIDATIONS
In the case of an open scan where the parcels are not assigned, the controller has the option to establish specific barcode validations to prevent the driver from collecting incorrect parcels.
Step 1 : On the left side, locate and tap the three dots at the bottom of the screen.
Step 2 : Within the menu that opens, select “Settings.”
Step 3 : Within the “Settings,” look for the “App Configuration” option.
Step 4 : Under “Action” navigate to “Scan & Collect/Deliver.”
Step 5 : Here, within the section labeled “Barcode Validation“, you can set up the prefix, postfix, and specify the desired barcode length.