Cancel Invoice allows users to void an already generated invoice.
This ensures incorrect or unnecessary invoices can be removed and properly tracked in the system.
How to Access
➡️ Navigate through the system:
- Go to Customers
- Click Customer Invoice
- Select Generate Invoices
Step-by-Step Process
1
Open Invoice List
- Navigate to Generate Invoices
- You will see the list of all created invoices
Invoice List
2
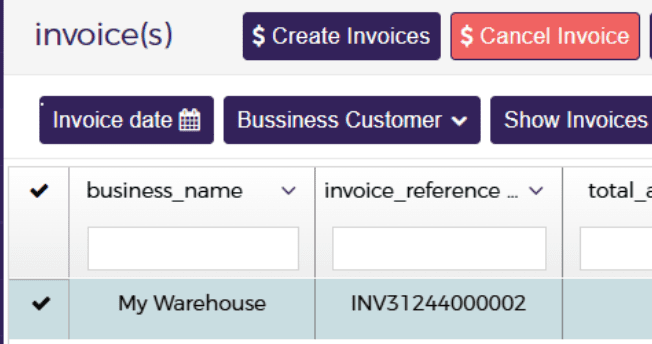
Select Invoice
- Tick the checkbox next to the invoice you want to cancel
Example:
- Select invoice using the checkbox column
3
Click Cancel Invoice
- Click on “Cancel Invoice” button at the top
Cancel Invoice Button
4
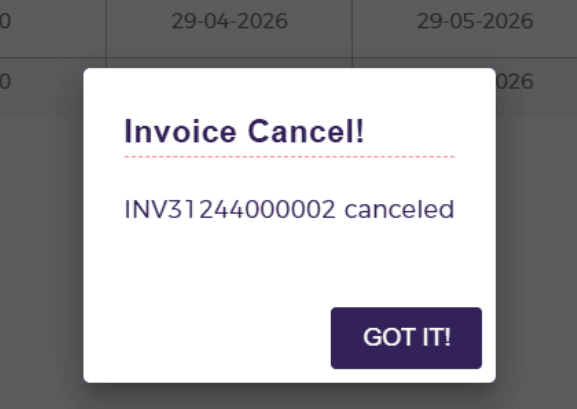
Confirmation Message
Once cancelled, you will see a confirmation:
Cancel Confirmation
“Invoice Cancel! INV31244000002 canceled”
5
View Cancelled Invoice Log
- After cancellation, you can track details in the log
Cancelled Invoice Log
The log includes:
- Date & Time
- Cancelled By (User)
- Invoice Reference Number

Output
- Invoice is successfully cancelled
- System displays confirmation message
- Cancellation details are logged for tracking
Important Notes
- Cancelled invoices are no longer valid for billing
- Always verify before cancelling
- Use logs for audit and tracking purposes
Best Practices
- Double-check invoice before cancelling
- Keep record of cancellation reason (internally)
- Use logs to track user actions and history