Who is a customer in InstaDispatch?
A customer is a company or individual account created in InstaDispatch so bookings, billing, balances, addresses, and portal access can be managed from the customer module.
Customers can be created in two ways:
- Without login credentials: the customer is created for internal operational use only.
- With login credentials: the customer can also access the customer portal using an email address and password. To log in, the customer must use the following URL: https://customer.instadispatch.com. This URL can also be white-labeled (branded) based on your business requirements.
- Make sure you are logged in to InstaDispatch with permission to manage customers.
- Keep the customer business name, customer type, email address, and address details ready.
- For portal users, decide whether you will set a password manually or use Auto Generate Password.
- Use a valid customer email address if login details need to be sent by email.
Customer Types & Payment Handling in InstaDispatch
In InstaDispatch, customers can be configured based on how they manage and pay for their deliveries. This flexibility allows businesses to support different billing models depending on their operational and financial preferences.
There are two primary types of customers:
1. Postpaid Customers
Postpaid customers are those who are allowed to use delivery services on credit.
- A credit limit is defined while creating or configuring the customer.
- When a job is created by the customer or for the customer, the job cost is automatically recorded against their account.
- The system tracks the total outstanding balance against the defined credit limit.
- Admins can generate invoices directly from the system for all completed jobs.
- These invoices can then be shared with the customer for payment settlement.
Ideal for businesses working with regular clients who prefer periodic billing (e.g., weekly or monthly invoicing).
2. Prepaid Customers
Prepaid customers are required to maintain a balance before booking deliveries.
- Customers can top up their account directly from their portal using integrated payment gateways such as PayPal or Stripe.
- The available balance is updated instantly in the system after a successful transaction.
- When a job is booked, the delivery cost is deducted immediately from the available balance.
- If insufficient balance is available, the system can restrict job creation.
Best suited for new customers or businesses that prefer upfront payments to maintain cash flow control.
3. Payment Tracking & History
InstaDispatch maintains a complete and transparent payment history for every customer:
- All top-ups (for prepaid customers) are recorded with transaction details.
- All job-related charges and deductions are tracked automatically.
- Invoices (for postpaid customers) are stored and accessible within the system.
- Admins and customers can view detailed payment logs and account statements at any time.
This ensures full visibility and simplifies financial management for both the business and its customers.
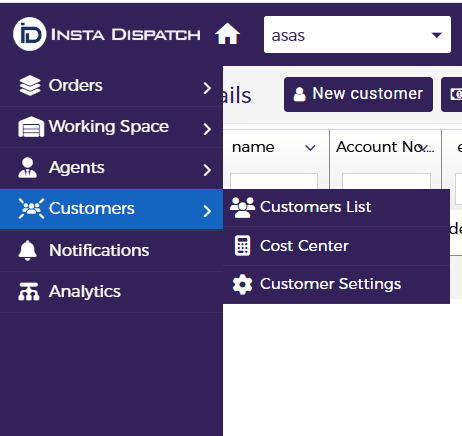
Open the customer creation screen
- From the left-hand menu, click Customers.
- Select Customers List.
- From the top menu, click New customer.
- The customer details pop-up will open. From here you can create a customer with or without login credentials.
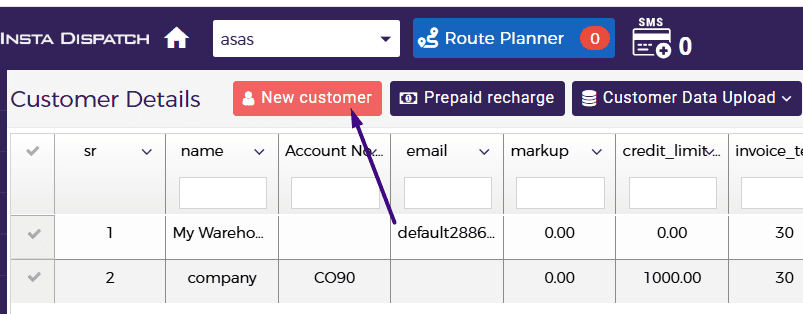
New customer button in the customer grid
Create a customer without login credentials
Use this option when the customer needs to exist in the system, but does not require customer portal access.
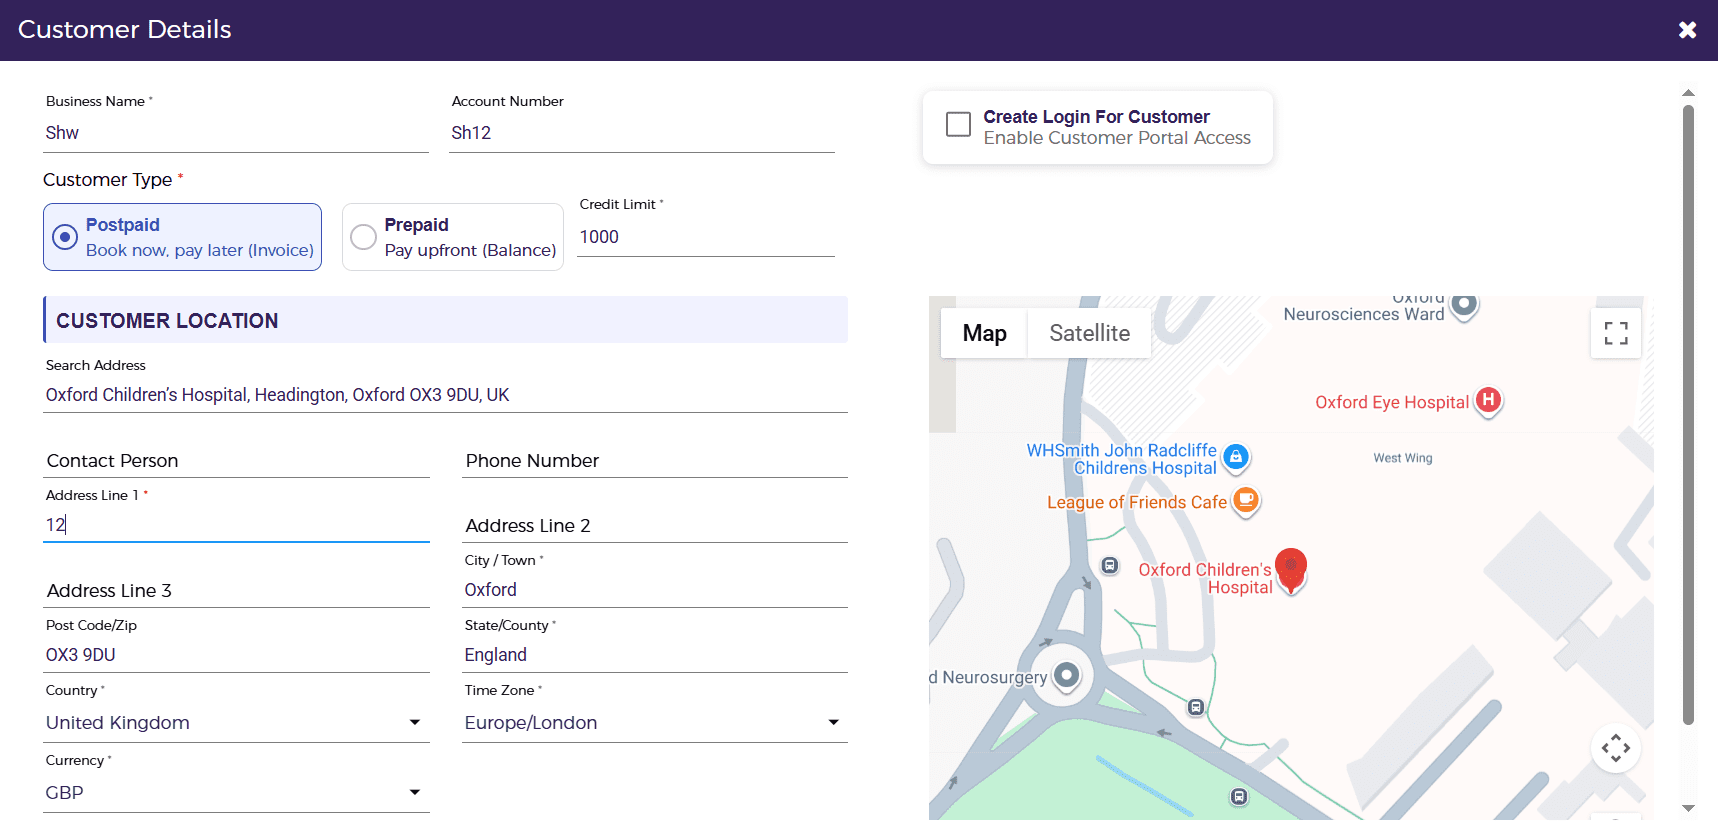
- Enter the Business Name.
- Select the Customer Type: Postpaid or Prepaid.
- Enter the Account Number if required, or allow the system to auto-generate it.
- Complete optional fields such as Vendor Number and Contract Number if needed.
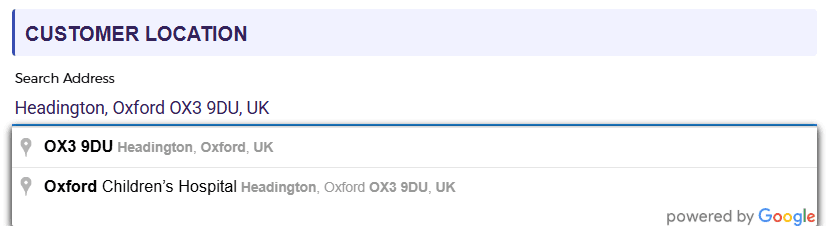
- Search the customer address in the Search Address field, or enter the address manually.
- Review the auto-filled address and customer details.
- Click Save to create the customer.
- Confirm the customer now appears in the customer grid.
| Field guidance |
| Postpaid customers usually work on an invoicing cycle and can include a credit limit. |
| Prepaid customers pay from the available recharge balance at the time of booking. |
| Vendor Number and Contract Number are optional. |
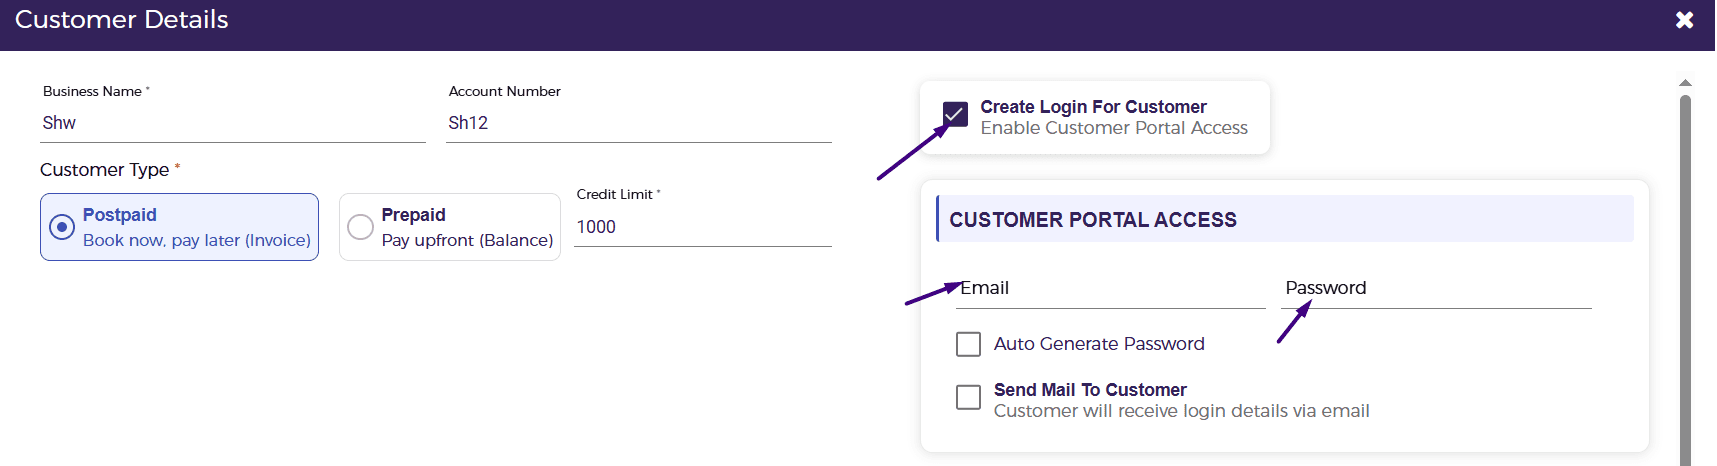
Create a customer with login credentials
Use this option when the customer should be able to access the customer portal.
- Enter the Business Name.
- Select the Customer Type: Postpaid or Prepaid.
- Enter the Account Number if needed, or allow the system to auto-generate it.
- Complete any optional fields such as Vendor Number and Contract Number.
- Tick Create Login For Customer to enable portal access.
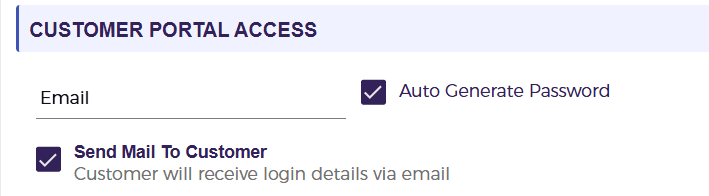
- Enter the customer email address.
- Either type the password manually or tick Auto Generate Password.
- Tick Send Mail To Customer if the login details should be emailed to the customer.
- Search or enter the customer address and then click Save.
- Verify the saved customer appears in the customer grid.
| Password and email notes |
| If Auto Generate Password is selected, the system generates the password automatically. |
| If Send Mail To Customer is selected, the customer receives the login details by email. |
| If you enter a password manually, make sure it is shared with the customer securely. |
Delete/In-Active a customer
Delete a customer from the customer grid when the account should no longer remain active in the system.
- Open Customers > Customers List.
- Find the customer in the grid.
- Go to the Action column for that customer. Click the Delete icon.
- In order to make an inactive customer without removing it completely from the dashboard disables its status.
- If the system asks for confirmation, confirm the deletion.
- Check that the customer is removed from the list or no longer active.

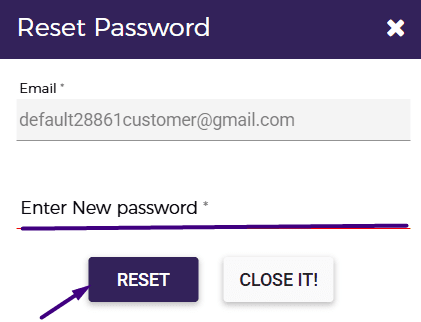
Update or reset a customer password
Use the reset password option when an existing portal user needs a new password.
- Open Customers > Customers List.
- Find the customer in the grid.
- Go to the Action column and click Reset Password.
- In the Reset Password pop-up, review the customer email address.
- Enter the new password in the Enter New Password field.
- Click Reset to save the updated password.
- Ask the customer to use the new password for future logins.

Quick summary
- Create without login credentials when only an internal customer record is needed.
- Create login credentials when customer portal access is required.
- Use Auto Generate Password and Send Mail To Customer when you want the system to send login details automatically.
- Use Delete from the Action column to remove a customer.
- Use Reset Password from the Action column to update an existing customer password.
Note: Customers can also create logins for their team, known as Customer Users in InstaDispatch. These are individual user logins that allow each team member to access the system separately via the customer portal. Follow the dedicated guide to create Customer Users in InstaDispatch.