What is a vehicle in InstaDispatch?
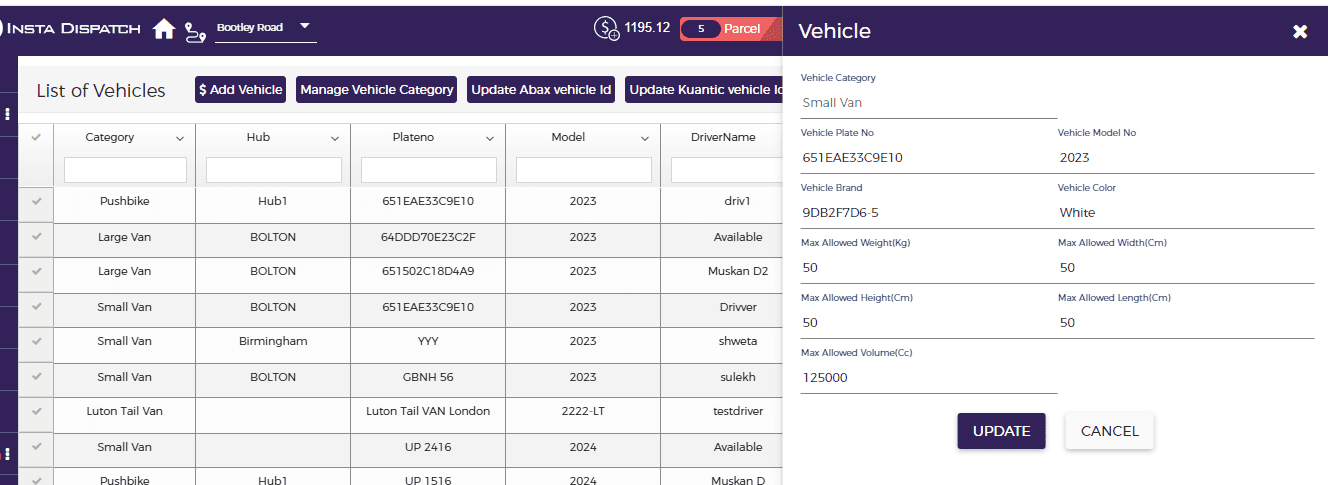
A vehicle in InstaDispatch is the transport unit used for operational planning and driver allocation. Each vehicle record stores the vehicle category, plate number, brand, model, colour, and carrying capacity details.
Vehicles are important because they help the Dispatcher:
- assign the correct vehicle type to a driver,
- maintain operational vehicle records in one place,
- set capacity rules such as weight, width, height, and length, and
- link a vehicle to inspection forms for compliance and routine checks.
Make sure at least one active driver is available before enabling automated rules.
- Make sure you are logged in to InstaDispatch with access to Set Users, Vehicle, and Driver management.
- Keep the vehicle category, plate number, brand, model number, and capacity information ready.
- If the required vehicle type does not already exist, create the vehicle category first.
- If you plan to allocate the vehicle to a driver, confirm that the driver already exists in the system.
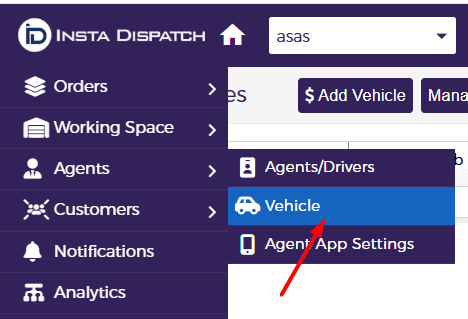
Open the vehicle screen
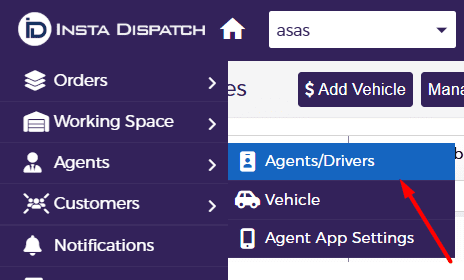
- From the left-hand menu, go to Agents.
- Select Vehicle from the menu options.
Create a vehicle
Use this option when you want to add a new vehicle record to the system.
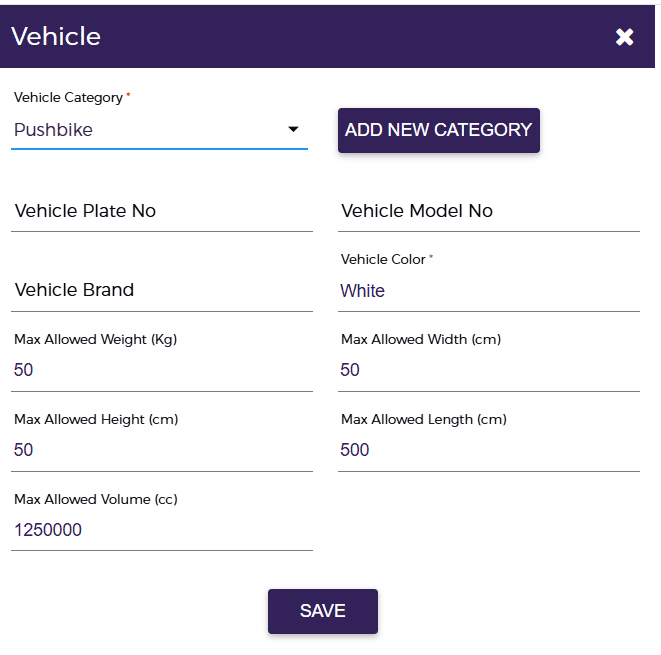
- Open the Add Vehicle pop-up.
- Select the Vehicle Category.
- Enter the Vehicle Plate No.
- Select or enter the Vehicle Brand and Vehicle Model No. as required.
- Select the Vehicle Colour.
- Complete the capacity details such as Max Allowed Weight, Width, Height, Length, and Volume.
- Click SAVE.
Field guidance:
- Vehicle Category: choose the category that matches the vehicle you want to use.
- Vehicle Plate No.: use the plate number for the vehicle being added.
- Vehicle Brand and Vehicle Model No.: record the brand and model details for identification.
- Vehicle Colour: store the vehicle colour for quick recognition.
- Max Allowed Weight, Width, Height, Length, and Volume: use these values to define the parcel capacity allowed for that vehicle.
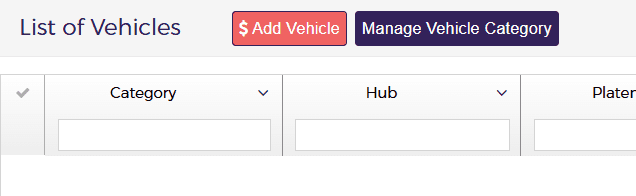
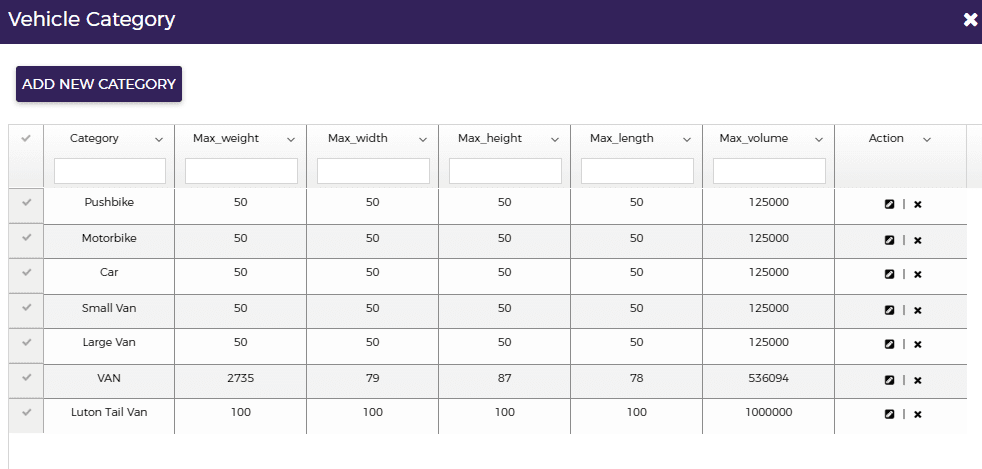
Add a vehicle category
If the required vehicle type is not available in the predefined list, create a new vehicle category first.
- From the List of Vehicles screen, click Manage Vehicle Category.
- In the Vehicle Category window, click ADD NEW CATEGORY.
- Enter the category information.
- Click SAVE to add the new category.

![]()
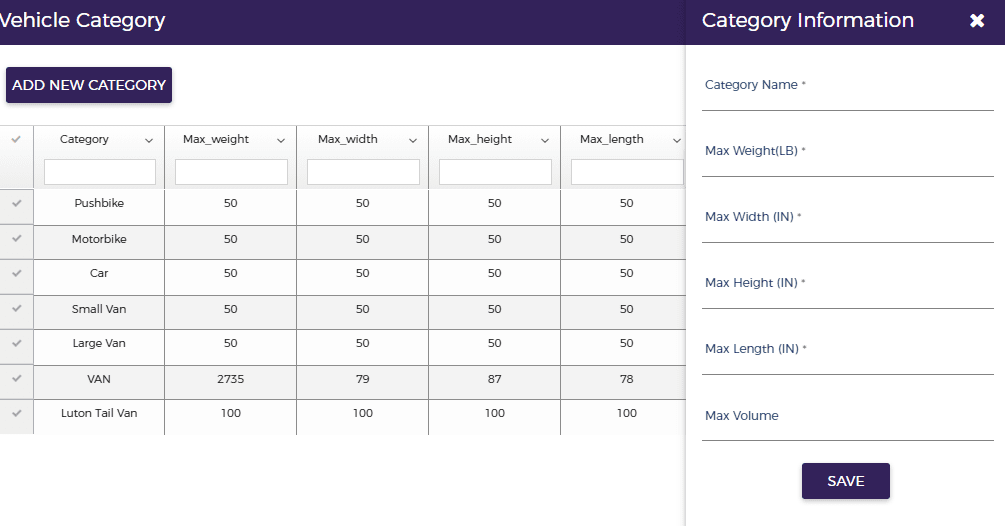
Category information normally includes the category name and the maximum size or capacity values for that vehicle type.
Associate a vehicle with a driver
Use this process when a vehicle needs to be linked to a driver record.
- From the left-hand menu, go to Agents.
- Select Driver.
- In the driver list, click the Edit Driver icon for the required driver.
- In the vehicle section, select the Vehicle Category.
- In the Plate No. field, choose a vehicle from the drop-down list.
- Save the driver update.

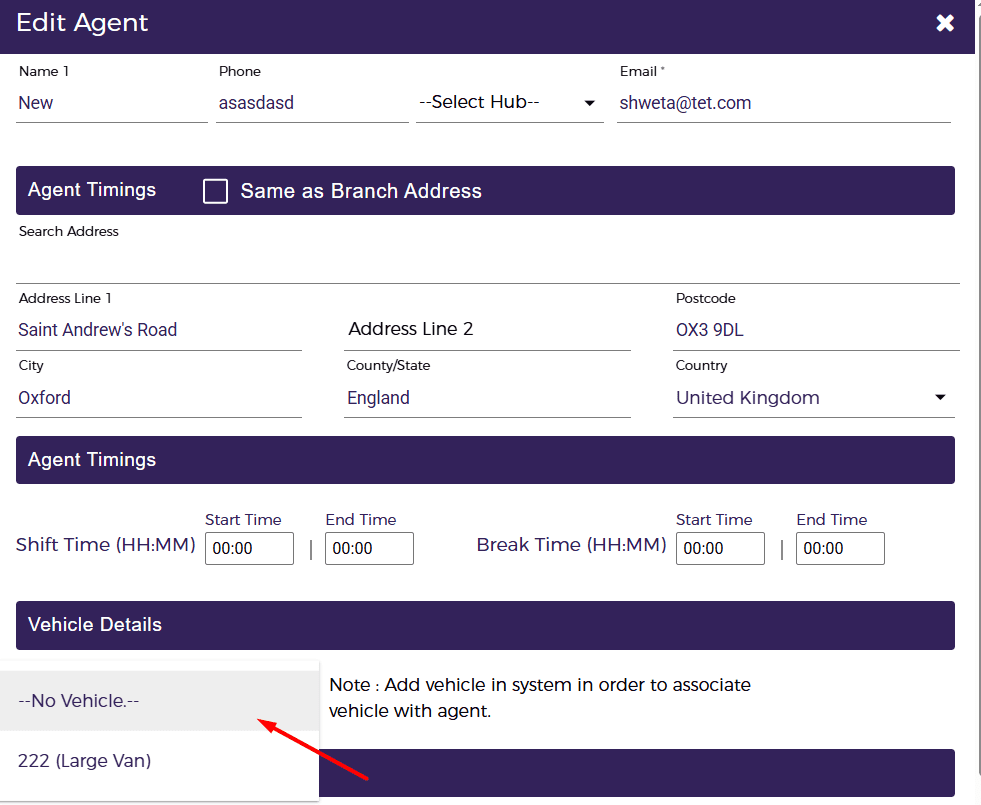
Important note: The plate number list only shows vehicles from the selected category under drop-down that are not already assigned to another driver.
If no vehicle is shown, you can either:
- Create a new vehicle on the Vehicle page, or
- Use the “Auto Create Vehicle” option (if available).
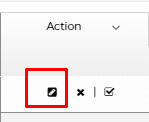
Edit a vehicle
Use the edit option when you need to change vehicle details such as category, model, brand, colour, or capacity.
- Open the List of Vehicles page.
- Go to the Action column on the right side of the vehicle list.
- Click the Edit icon.
- Update the required information in the pop-up window.
- Click UPDATE.

Delete a vehicle
Use this option only when the vehicle record is no longer required in the system.
- Open the List of Vehicles page.
- Find the required vehicle.
- In the Action column, click the Delete icon.
- Confirm the deletion if prompted.

Deleting a vehicle permanently removes it from the system, so review the record carefully before deleting it.
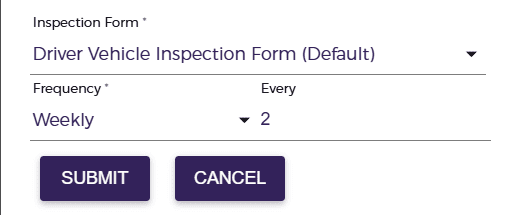
Associate a vehicle with an inspection form
This allows the vehicle to follow the required inspection process at the chosen frequency.
- Open the List of Vehicles page.
- In the Action column, select the inspection form icon option for the required vehicle.
- Choose the default or added vehicle inspection form.
- Set the inspection frequency, such as Weekly or Daily.
- Click SUBMIT.