What is a Branch in InstaDispatch?
A Branch in InstaDispatch is the operational location of your delivery business from where jobs can be managed and dispatched. It can represent your office, warehouse, depot, hub, or service location depending on how your business operates.
A Branch helps you organise operations by location so that drivers, jobs, and activities can be managed in a structured way within the system.
You can use branches when your business operates from:
- one main office
- multiple depots
- different warehouse locations
- separate city or region-based operation centres
In simple terms, a Branch is the place in InstaDispatch that represents where your delivery operations are being managed from.
The key difference is:
- Branch = Independent operational control unit
- Hub = Internal logistics point within a branch
Branch (Operational Separation)
A Branch in InstaDispatch acts as a complete and independent operation.
- Each branch operates separately
- Teams of one branch cannot see or access another branch’s data
- Access is strictly controlled
- Only Admin/Dispatcher with permission can access specific branches
This includes:
- Jobs
- Drivers
- Customers
- Operations data
👉 Branch controls visibility and access
Hub (Logistics Flow Within Branch)
A Hub is used inside a branch to manage delivery flow.
- Hubs are created within a branch
- One branch can have multiple hubs
- Used for:
- Multi-stop deliveries
- Multi-leg deliveries
- Intermediate shipment movement
👉 Hub does NOT control access — it supports delivery flow
• Ensure access to Working Space module
• Keep branch details like email, address and phone number ready
Create a Branch
From the left-hand menu, click Working Space.
Select Branches.
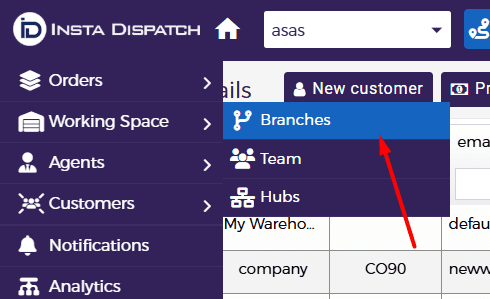
Click Add Branch.
![]()
A pop-up window will open.
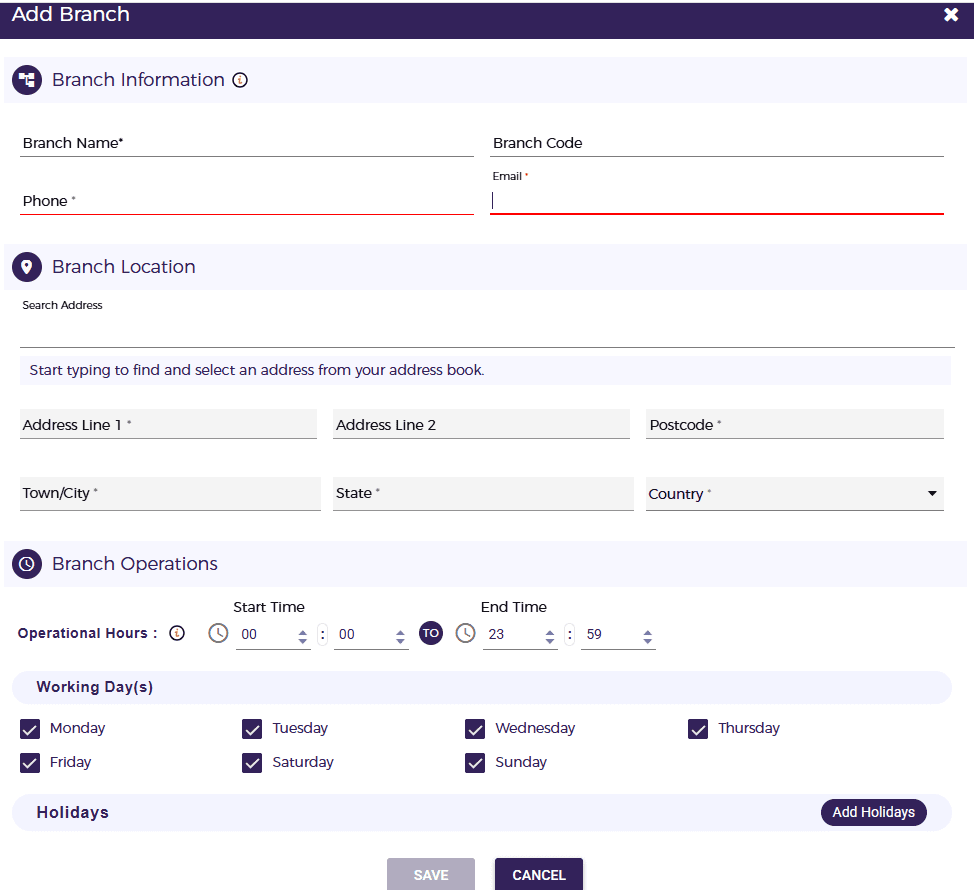
Enter required details.
Click Save.
- Branch Name
• Branch Code
• Address Line 1
• City
• State
• Postcode
Branch Operations
- Operational Hours:
Set the branch operational hours to define when bookings can be created. Users and customers will not be able to book jobs outside these defined hours. - Working Days:
Select the working days for the branch. Bookings can only be made on the selected days. - Holidays:
Add branch-specific holidays to prevent bookings on non-working days. This helps avoid scheduling jobs during holidays and reduces operational conflicts.
All mandatory fields must be filled.
4. Edit a Branch
- Go to the Branch list.
- Locate branch.
- Click the Edit icon.
- Update details.
- Click Update.
 5. Delete a Branch
 5. Delete a Branch
- Go to Branch list.
- Click Delete icon.
- Confirm deletion.

Deleted branch cannot be recovered. If a user has access to more than one branch, they can switch between them directly from the portal. 👉 Branch selection controls which operational data the user is currently working on6. How Admin / Team Members Switch Between Branches
How it works:
