Quick Import is a feature that allows users to create and book delivery jobs in bulk by uploading a CSV file.
The system automatically extracts shipment details from the file, reducing manual effort and enabling faster processing.
When to Use Quick Import
Use Quick Import when:
- Creating domestic shipments (same origin & destination country)
- You want a simple file format with minimal required fields
Pickup address is automatically taken from the selected customer settings
Mandatory Fields (CSV File)
Each row must contain:
- deliverycompanyname
- receiverName
- receiverEmail
- receiverPhone
- deliveryAddress1
- deliveryAddress2
- deliveryCity
- deliveryCounty
- deliveryCountry
- deliveryPostcode
- collectionDate
- parcelWeight1
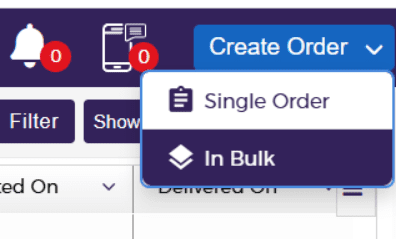
Step-by-Step Process
- Go to Create Order
- Click In Bulk
- Choose the Customer
- Select Import Type = Quick Import
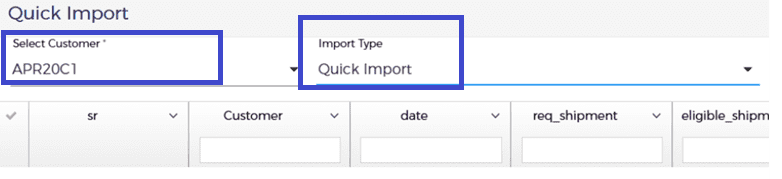
- Click “CHOOSE FILE”
- Upload your CSV file
- (Optional) Download Sample File for correct format

Go to the SERVICE tab and fill:
- Pickup Date
- Booking Carrier
- Service
- Pickup Start Time
- Pickup End Time
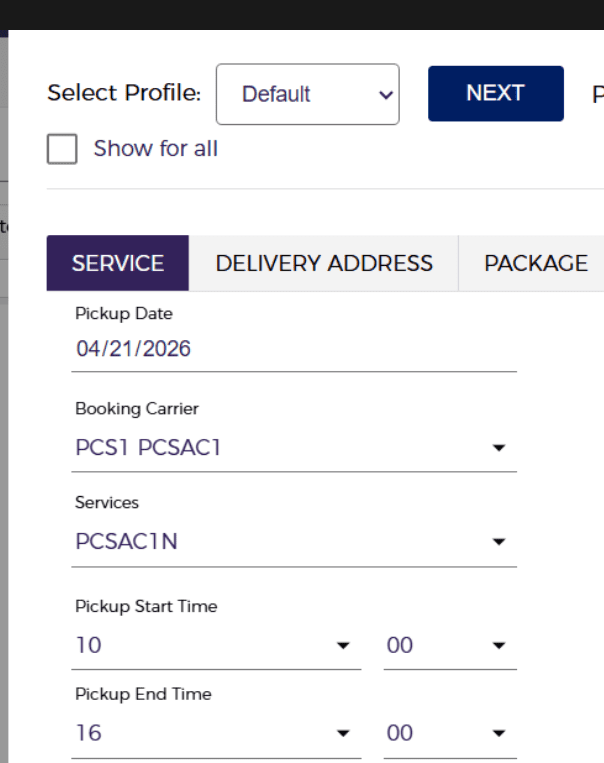
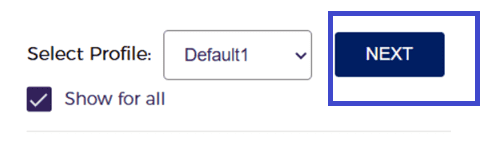
- Click NEXT to process the uploaded file
You will see a confirmation message:
“Your request has been registered, will update you while done!!”
Once processing is complete, you will see:
“Uploading csv data has been processed successfully!!”
After processing, the system displays:
- Requested File (req_csv) → Original uploaded file
- Response File (res_csv) → Processing results
Response File Details
The response file includes:
- Number of successful jobs
- Number of failed jobs
- Failure reasons for each failed record
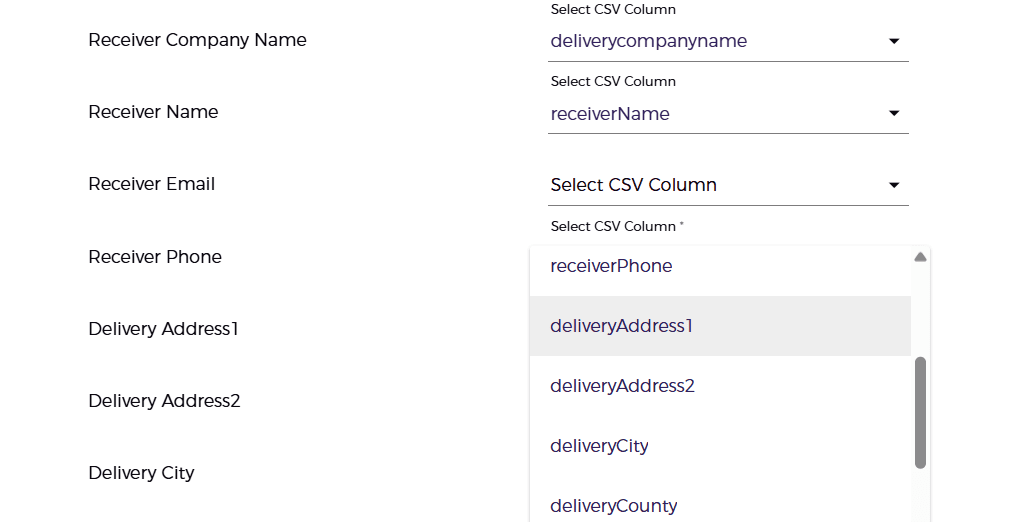
If you are using a custom file or new profile, you will need to map the columns:
- Match each InstaDispatch field (e.g., Receiver Name, Delivery City)
with the corresponding column from your CSV file - Use the dropdowns to select the correct CSV column for each field
Once mapping is complete:
- Enter a Profile Name
- Click “Save” to store the mapping profile

- Saved profiles can be reused for future uploads
- This avoids repeated mapping for the same file structure
Package Details Handling (Quick Import)
- Only parcel weight (parcelWeight1) is required
- Dimensions are not required
Default Values Applied:
- Length = 1 cm
- Width = 1 cm
- Height = 1 cm
Output
- Jobs are created and booked successfully
- Uploaded file is attached to the job for reference
Best Practices
- Always use a clean CSV template
- Review data before uploading
- Ensure accuracy to avoid failures
- Pickup address is auto-filled from customer settings
- Best suited for standard and repeat jobs